Theme Development
underscores.me/
CREATE YOUR UNDERSCORES BASED THEME
Theme Handbook - Themes Basics
developer.wordpress.org/themes/basics/
#11 - How To Add Widget Areas To The Front Page (Part - 2) (Bangla)
Video Tuts Series by Rex Academy Bangla - Jul 11, 2016
Wordpress 101 - Theme development
Video Tuts series by Alessandro Castellani
WordPress Tutorial 1: Introduction
Video Tuts series of theme development by - LearnWEbCode - Apr 29, 2014
WordPress Basic Theme Development in Bangla | Class 9
Video Tuts Series by Abdullah Nahian - Aug 3, 2020
shikhun.net/courses/advance-wordpress-theme-development/
Video Series tutorial by Shikhun.net
<!doctype html>
<html lang="en-US">
<head>
	<meta charset="UTF-8" />
	<meta name="viewport" content="width=device-width, initial-scale=1" />

	<title><?php bloginfo(); wp_title('|',true,'left'); ?> </title>

	<?php wp_head();  ?>

</head>

<body <?php body_class();  ?> >
An extremely simple index.php file would look like:
<?php
    get_header();
    if ( have_posts() ) : while ( have_posts() ) : the_post();
        the_content();
    endwhile;
    else :
        _e( 'Sorry, no posts matched your criteria.', 'textdomain' );
    endif;
    get_sidebar();
    get_footer();
?>
<p>© <?php echo date('Y');  ?> - Compnay Name</p>

<?php wp_nav_menu("theme_locatoin", "footer_menu"); ?>
<?php wp_footer(); ?>
</body>
</html>
/*
	Theme Name: Twenty Seventeen
	Theme URI: https://wordpress.org/themes/twentyseventeen/
	Author: the WordPress team
	Author URI: https://wordpress.org/
	Description: Twenty Seventeen brings your site to life with immersive featured images and subtle animations.
	With a focus on business sites, it features multiple sections on the front page as well as widgets, navigation and social menus,
	a logo, and more. Personalize its asymmetrical grid with a custom color scheme and showcase your multimedia content with post formats.
	Our default theme for 2017 works great in many languages, for any abilities, and on any device.
	Version: 1.0
	License: GNU General Public License v2 or later
	License URI: http://www.gnu.org/licenses/gpl-2.0.html
	Text Domain: twentyseventeen
	Tags: one-column, two-columns, right-sidebar, flexible-header, accessibility-ready, custom-colors, custom-header, custom-menu,
	custom-logo, editor-style, featured-images, footer-widgets, post-formats, rtl-language-support, sticky-post, theme-options,
	threaded-comments, 	translation-ready.
	This theme, like WordPress, is licensed under the GPL.
	Use it to make something cool, have fun, and share what you've learned with others.
*/
Navigation menu style explained+
WordPress basic CSS for styling nav menus with wp_page_menu taken into account. Supports sub-menus as dropdowns.
// Somewhere in your header.php add this. container_class and menu_class should match the CSS main class.
wp_nav_menu( array( 'theme_location' => 'primary', 'container_class' => 'nav-menu', 'menu_class' => 'nav-menu' ) );
// style.css

div.nav-menu ul {
    list-style: none;
    margin: 0;
    padding: 0;
}
div.nav-menu li {
    position: relative;
    line-height: 1.7;
}
div.nav-menu a {
    color: #fff;
    text-decoration: none;
    display: block;
}
div.nav-menu > ul > li {
    float: left;
}
div.nav-menu > ul > li > a{
    padding: 10px 10px;
}
div.nav-menu > ul > li:hover > a{
    background: #333;
}

/* Sub/Children Menu */
div.nav-menu .sub-menu,
div.nav-menu .children {
    position: absolute;
    left: 0;
    top: 100%;
    z-index: 1;
    background: #333;
    min-width: 200px;
    display: none;
}
div.nav-menu li:hover > .sub-menu,
div.nav-menu li:hover > .children {
    display: block;
}
div.nav-menu .sub-menu a,
div.nav-menu .children a {
    padding: 5px 10px;
}
div.nav-menu .sub-menu li:hover a,
div.nav-menu .children li:hover a {
    background: #444;
}

/* Grandchildren Menu */
div.nav-menu .sub-menu .sub-menu,
div.nav-menu .children .children {
    position: absolute;
    left: 100%;
    top: 0;
    background: #444;
}
Default WordPress Generated CSS Cheat Sheet+
Default Body Class Styles
.rtl {}
.home {}
.blog {}
.archive {}
.date {}
.search {}
.paged {}
.attachment {}
.error404 {}
.single postid-(id) {}
.attachmentid-(id) {}
.attachment-(mime-type) {}
.author {}
.author-(user_nicename) {}
.category {}
.category-(slug) {}
.tag {}
.tag-(slug) {}
.page-parent {}
.page-child parent-pageid-(id) {}
.page-template page-template-(template file name) {}
.search-results {}
.search-no-results {}
.logged-in {}
.paged-(page number) {}
.single-paged-(page number) {}
.page-paged-(page number) {}
.category-paged-(page number) {}
.tag-paged-(page number) {}
.date-paged-(page number) {}
.author-paged-(page number) {}
.search-paged-(page number) {}
Default Post Styles
.post-id {}
.post {}
.page {}
.attachment {}
.sticky {}
.hentry {}
.category-misc {}
.category-example {}
.tag-news {}
.tag-wordpress {}
.tag-markup {}
WordPress adds dynamic classes to your post using the post_class () function that will allow us to create our own styles for each format. The post_class () function will add a class in the form of “.format-foo” where foo is whatever post format we have chosen ie. gallery, image, etc.
.format-image {}
.format-gallery {}
.format-chat {}
.format-link {}
.format-quote {}
.format-status {}
.format-video {}
Default Menu Styles
#header .main-menu{} // container class
#header .main-menu ul {} // container class first unordered list
#header .main-menu ul ul {} //unordered list within an unordered list
#header .main-menu li {} // each navigation item
#header .main-menu li a {} // each navigation item anchor
#header .main-menu li ul {} // unordered list if there is drop down items
#header .main-menu li li {} // each drop down navigation item
#header .main-menu li li a {} // each drap down navigation item anchor

.current_page_item{} // Class for Current Page
.current-cat{} // Class for Current Category
.current-menu-item{} // Class for any other current Menu Item
.menu-item-type-taxonomy{} // Class for a Category
.menu-item-type-post_type{} // Class for Pages
.menu-item-type-custom{} // Class for any custom item that you added
.menu-item-home{} // Class for the Home Link
Default WordPress Widget Styles
.widget {}

#searchform {}
.widget_search {}
.screen-reader-text {}

.widget_meta {}
.widget_meta ul {}
.widget_meta ul li {}
.widget_meta ul li a {}

.widget_links {}
.widget_links ul {}
.widget_links ul li {}
.widget_links ul li a {}

.widget_archive {}
.widget_archive ul {}
.widget_archive ul li {}
.widget_archive ul li a {}
.widget_archive select {}
.widget_archive option {}

.widget_pages {}
.widget_pages ul {}
.widget_pages ul li {}
.widget_pages ul li a {}

.widget_links {}
.widget_links li:after {}
.widget_links li:before {}
.widget_tag_cloud {}
.widget_tag_cloud a {}
.widget_tag_cloud a:after {}
.widget_tag_cloud a:before {}

.widget_calendar {}
#calendar_wrap {}
#calendar_wrap th {}
#calendar_wrap td {}
#wp-calendar tr td {}
#wp-calendar caption {}
#wp-calendar a {}
#wp-calendar #today {}
#wp-calendar #prev {}
#wp-calendar #next {}
#wp-calendar #next a {}
#wp-calendar #prev a {}

.widget_categories {}
.widget_categories ul {}
.widget_categories ul li {}
.widget_categories ul ul.children {}
.widget_categories a {}
.widget_categories select{}
.widget_categories select#cat {}
.widget_categories select.postform {}
.widget_categories option {}
.widget_categories .level-0 {}
.widget_categories .level-1 {}
.widget_categories .level-2 {}
.widget_categories .level-3 {}

.recentcomments {}
#recentcomments {}
#recentcomments li {}
#recentcomments li a {}
.widget_recent_comments {}

.widget_recent_entries {}
.widget_recent_entries ul {}
.widget_recent_entries ul li {}
.widget_recent_entries ul li a {}

.textwidget {}
.widget_text {}
.textwidget p {}
you could combine .widget_pages ul and .widget_archive ul by doing something like this:
.widget_pages ul, .widget_archive ul {}
Default Comment Form Styles
/*Comment Output*/

.commentlist .reply {}
.commentlist .reply a {}

.commentlist .alt {}
.commentlist .odd {}
.commentlist .even {}
.commentlist .thread-alt {}
.commentlist .thread-odd {}
.commentlist .thread-even {}
.commentlist li ul.children .alt {}
.commentlist li ul.children .odd {}
.commentlist li ul.children .even {}

.commentlist .vcard {}
.commentlist .vcard cite.fn {}
.commentlist .vcard span.says {}
.commentlist .vcard img.photo {}
.commentlist .vcard img.avatar {}
.commentlist .vcard cite.fn a.url {}

.commentlist .comment-meta {}
.commentlist .comment-meta a {}
.commentlist .commentmetadata {}
.commentlist .commentmetadata a {}

.commentlist .parent {}
.commentlist .comment {}
.commentlist .children {}
.commentlist .pingback {}
.commentlist .bypostauthor {}
.commentlist .comment-author {}
.commentlist .comment-author-admin {}

.commentlist {}
.commentlist li {}
.commentlist li p {}
.commentlist li ul {}
.commentlist li ul.children li {}
.commentlist li ul.children li.alt {}
.commentlist li ul.children li.byuser {}
.commentlist li ul.children li.comment {}
.commentlist li ul.children li.depth-{id} {}
.commentlist li ul.children li.bypostauthor {}
.commentlist li ul.children li.comment-author-admin {}

#cancel-comment-reply {}
#cancel-comment-reply a {}

/*Comment Form */

#respond { }
#reply-title { }
#cancel-comment-reply-link { }
#commentform { }
#author { }
#email { }
#url { }
#comment
#submit
.comment-notes { }
.required { }
.comment-form-author { }
.comment-form-email { }
.comment-form-url { }
.comment-form-comment { }
.form-allowed-tags { }
.form-submit
What is functions.php? +
The functions.php file behaves like a WordPress plugin, adding features and functionality to a WordPress site. You can use it to call WordPress functions and to define your own functions.
Note: The same result can be produced using either a plugin or functions.php. If you are creating new features that should be available no matter what the website looks like, it is best practice to put them in a plugin.
There are advantages and tradeoffs to either using a WordPress plugin or using functions.php.
A WordPress plugin:
- requires specific, unique header text;
- is stored in wp-content/plugins, usually in a subdirectory;
- only executes on page load when activated;
- applies to all themes; and
- should have a single purpose – for example, offer search engine optimization features or help with backups.
Meanwhile, a functions.php file:
- requires no unique header text;
- is stored in theme’s subdirectory in wp-content/themes;
- executes only when in the active theme’s directory;
- applies only to that theme (if the theme is changed, the features can no longer be used); and
- can have numerous blocks of code used for many different purposes.
Each theme has its own functions file, but only code in the active theme’s functions.php is actually run. If your theme already has a functions file, you can add code to it. If not, you can create a plain-text file named functions.php to add to your theme’s directory, as explained below.
A child theme can have its own functions.php file. Adding a function to the child functions file is a risk-free way to modify a parent theme. That way, when the parent theme is updated, you don’t have to worry about your newly added function disappearing.
Note: Although the child theme’s functions.php is loaded by WordPress right before the parent theme’s functions.php, it does not override it. The child theme’s functions.php can be used to augment or replace the parent theme’s functions. Similarly, functions.php is loaded after any plugin files have loaded.
With functions.php you can:
- Use WordPress hooks. For example, with the excerpt_length filter you can change your post excerpt length (from default of 55 words).
- Enable WordPress features with add_theme_support(). For example, turn on post thumbnails, post formats, and navigation menus.
- Define functions you wish to reuse in multiple theme template files
Warning: If a WordPress plugin calls the same function, or filter, as you do in your functions.php, the results can be unexpected, even causing your site to be disabled.
Note: It’s important to namespace your functions with your theme name. All examples below use myfirsttheme_ as their namespace, which should be customized based on your theme name.
Navigation Menus +
Custom navigation menus allow users to edit and customize menus in the Menus admin panel, giving users a drag-and-drop interface to edit the various menus in their theme.
You can set up multiple menus in functions.php. They can be added using register_nav_menus() and inserted into a theme using wp_nav_menu(), as discussed later in this handbook. If your theme will allow more than one menu, you should use an array. While some themes will not have custom navigation menus, it is recommended that you allow this feature for easy customization.
register_nav_menus( array(
	'primary'   => __( 'Primary Menu', 'myfirsttheme' ),
	'secondary' => __( 'Secondary Menu', 'myfirsttheme' )
) );
register_nav_menus( array(

		'topbar-menu' => esc_html__( 'Top Bar Menu', 'shop-elite' ),

		'social-nav' => esc_html__( 'Social Nav', 'shop-elite' ),

		'primary' => esc_html__( 'Primary', 'shop-elite' ),

		'primary-zippo' => esc_html__( 'Primary Zippo', 'shop-elite' ),

		'primary-tote' => esc_html__( 'Primary Todays Telegram', 'shop-elite' ),

) );
Load Text Domain +
Load Text Domain
Themes can be translated into multiple languages by making the strings in your theme available for translation. To do so, you must use load_theme_textdomain(). For more information on making your theme available for translation, read the internationalization section.
load_theme_textdomain( 'myfirsttheme', get_template_directory() . '/languages' );
Excerpt Length +
developer.wordpress.org/reference/hooks/excerpt_length/
wordpress.org/plugins/advanced-excerpt/
wpexplorer.com/custom-excerpt-lengths-wordpress/
Insert the following piece of code into your functions.php file and edit the “20” to the amount of words you want to show in your excerpts.
function custom_excerpt_length() {
  return 25;
}
add_filter('excerpt_length','custom_excerpt_length');
add_filter( 'excerpt_length', function($length) {
    return 20;
} );
Post Thumbnails +
Post Thumbnails
Post thumbnails and featured images allow your users to choose an image to represent their post. Your theme can decide how to display them, depending on its design. For example, you may choose to display a post thumbnail with each post in an archive view. Or, you may want to use a large featured image on your homepage. While not every theme needs featured images, it’s recommended that you support post thumbnails and featured images.
add_theme_support( 'post-thumbnails' );
Initial Setup Example
Including all of the above features will give you a functions.php file like the one below. Code comments have been added for future clarity.
As shown at the bottom of this example, you must add the required add_action() statement to ensure the myfirsttheme_setup function is loaded.
WordPress Featured Image Tutorial
video tuts by LearnWebCode - May 27, 2014
add_theme_support( string $feature ) +
add_theme_support( string $feature )
Registers theme support for a given feature. Must be called in the theme’s functions.php file to work. If attached to a hook, it must be ‘after_setup_theme’. The ‘init’ hook may be too late for some features.
if ( function_exists( 'add_theme_support' ) ) {
    YOUR FEATURES GO HERE
}
add_theme_support( 'post-thumbnails' );
add_theme_support( 'post-thumbnails', array( 'post' ) );          // Posts only
add_theme_support( 'post-thumbnails', array( 'page' ) );          // Pages only
add_theme_support( 'post-thumbnails', array( 'post', 'movie' ) ); // Posts and Movies

add_image_size( 'thumbnail', 180, 150, true);
add_image_size( 'banner-size', 920, 310, array('left','top') );
add_image_size()
- Post-Formats→ This feature lets you know what type of post to be incorporated into your themes such as a gallery, aside, chat, link, image, quotes, status, video, and audio.
- Custom Background→ This features lets to incorporate custom background. You can include default arrays in the custom background such as color, image, size, callback, repeat, attachment, position, etc.
- Custom Logo→ these features enable you to specify your custom logo. You can include default arrays in the custom logo such as height, width, header-text, etc.
- Custom Header→ This feature allows you to include the custom header. You can include default arrays in the custom header such as width, height, image, upload, random-default, header-text, etc.
- Post Thumbnails→ This feature is actually used to display the featured images for a post or a page. You will be able to display this feature through the entire website with a variety of manners. You can choose the dimensions you want the post thumbnails to display.
- HTML5→ This feature is mainly used to enable the HTML5 for the comment form, gallery, search form, caption, and comment list.
- Customize Selective Refresh Widgets→ By enabling this feature, you will be able to selectively refresh the widgets, instead of refreshing your entire page when you are working with the customizer.
- Title Tag→ By enabling this feature, it lets your theme to control the title-tag. It will be added in the <head>.
- Feed Links→ This feature is mainly used to activate the automatic feed links so that the feed links can be used for RSS feeds for any posts and comments in the <head>.
1. Post Formats
add_theme_support( ‘post-formats’, array(
‘gallery’,
‘quote’,
‘video’,
‘aside’,
‘image’,
‘link’,
‘status’,
‘audio’,
‘chat’
) );
2. Custom Background
add_theme_support(‘custom-background’);
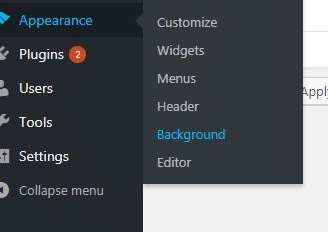
Specifying parameters for custom background
$def = array(
‘default-color’          => '',
‘default-image’          => '',
‘default-repeat’         => ‘repeat’,
‘default-position-x’     => ‘left’,
       ‘default-position-y’    => ’top’,
       ‘default-size’           => ‘auto’,
‘default-attachment’     => ‘scroll’,
‘wp-head-callback’       => ‘_custom_background_cb’,
‘admin-head-callback’    => '',
‘admin-preview-callback’ => ''
);
add_theme_support( ‘custom-background’, $def );
3. Custom Logo
add_theme_support(‘custom-logo’);
Specifying parameters
add_theme_support( ‘custom-logo’, array(
‘height’      => 100,
‘width’       => 400,
‘flex-height’ => true,
‘flex-width’  => true,
‘header-text’ => array( ‘site-title’, ‘site-description’ ),
) );
4. Custom Header
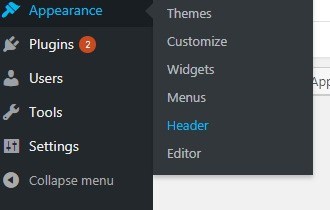
specifying parameters
$def = array(
‘default-image’          => '',
‘width’                  => 0,
‘height’                 => 0,
‘flex-height’            => false,
‘flex-width’             => false,
‘uploads’                => true,
‘random-default’         => false,
‘header-text’            => true,
‘default-text-color’     => '',
‘wp-head-callback’       => '',
‘admin-head-callback’    => '',
‘admin-preview-callback’ => '',
);
add_theme_support( ‘custom-header’, $def );

5. Post Thumbnails
add_theme_support( ‘post-thumbnails’ );
Passing arguments
add_theme_support( ‘post-thumbnails’, array( ‘post’ ) ); // posts only
add_theme_support( ‘post-thumbnails’, array( ‘page’ ) ); // pages only
add_theme_support( ‘post-thumbnails’, array( ‘your-post-type-name’ ) ); // custom post types
6. HTML5
add_theme_support( ‘html5’, array( ‘comment-list’, ‘comment-form’, ‘search-form, ‘gallery’, ‘caption’ ) );
7. Customize Selective Refresh Widgets
add_theme_support( ‘customize-selective-refresh-widgets’ );
8. Title Tag
add_theme_support( ‘title-tag’ );
9. Feed Links
add_theme_support( ‘automatic-feed-links’ );
A below example shows adding post thumbnails, HTML5, and post links. Place the following code in the functions.php file.

function wpblogx_theme_feature() {
 /* post formats */
 add_theme_support( ‘post-formats’, array( ‘aside’, ‘quote ) );

 /* post thumbnails */
 add_theme_support( 'post-thumbnails', array( ‘post’, ‘page’ ) );
 /* HTML5 */
 add_theme_support( ‘html5’ );
 /* automatic feed links */
 add_theme_support( ‘automatic-feed-links’ );
}
add_action( ‘after_setup_theme’, ‘wpblogx_theme_feature’ );
if ( ! function_exists( 'myfirsttheme_setup' ) ) :
/**
 * Sets up theme defaults and registers support for various WordPress features.
 *
 * Note that this function is hooked into the after_setup_theme hook, which runs
 * before the init hook. The init hook is too late for some features, such as indicating
 * support post thumbnails.
 */
function myfirsttheme_setup() {

    /**
     * Make theme available for translation.
     * Translations can be placed in the /languages/ directory.
     */
    load_theme_textdomain( 'myfirsttheme', get_template_directory() . '/languages' );

    /**
     * Add default posts and comments RSS feed links to <head>.
     */
    add_theme_support( 'automatic-feed-links' );

    /**
     * Enable support for post thumbnails and featured images.
     */
    add_theme_support( 'post-thumbnails' );

    /**
     * Add support for two custom navigation menus.
     */
    register_nav_menus( array(
        'primary'   => __( 'Primary Menu', 'myfirsttheme' ),
        'secondary' => __('Secondary Menu', 'myfirsttheme' )
    ) );

    /**
     * Enable support for the following post formats:
     * aside, gallery, quote, image, and video
     */
    add_theme_support( 'post-formats', array ( 'aside', 'gallery', 'quote', 'image', 'video' ) );
}
endif; // myfirsttheme_setup
add_action( 'after_setup_theme', 'myfirsttheme_setup' );
Theme Features +
Enqueuing Scripts and Styles +
wp_enqueue_script()
Common Mistake When Adding Scripts and Stylesheets in WordPress
Many new WordPress plugins and theme developers make the mistake of directly adding their scripts or inline CSS into their plugins and themes.
Some mistakenly use the wp_head function to load their scripts and stylesheets.
add_action('wp_head', 'wpb_bad_script');
function wpb_bad_script() {
echo 'jQuery goes here';
}
While the above code may seem easier, it is the wrong way of adding scripts in WordPress, and it leads to more conflicts in the future.
For example, if you load jQuery manually and another plugin loads jQuery through the proper method, then you have jQuery being loaded twice. If it is loaded on every page, then this will negatively affect WordPress speed and performance.
It is also possible that the two are different versions which can also cause conflicts.
Proper way to enqueue scripts and styles
There are two important functions that get loaded, one into header.php and the other into footer.php. The wp_head() function must be present in header.php
<?php wp_head(); ?>
While the wp_footer() function must be present in footer.php:
<? wp_footer(); ?>
They both look for any registered hooks within your plugins and themes. If something needs to be loaded in the header of a page, it gets pulled (or hooked) in by wp_head(), and likewise for the footer by wp_footer().
/**
 * Proper way to enqueue scripts and styles.
 */
function wpdocs_theme_name_scripts() {
    wp_enqueue_style( 'style-name', get_stylesheet_uri() );
    wp_enqueue_script( 'script-name', get_template_directory_uri() . '/js/example.js', array(), '1.0.0', true );
}
add_action( 'wp_enqueue_scripts', 'wpdocs_theme_name_scripts' );
/**
 * Enqueue a script with jQuery as a dependency.
 */
function wpdocs_scripts_method() {
    wp_enqueue_script( 'custom-script', get_stylesheet_directory_uri() . '/js/custom_script.js', array( 'jquery' ) );
}
add_action( 'wp_enqueue_scripts', 'wpdocs_scripts_method' );
wp_enqueue_script( $handle, $src, $deps, $ver, $in_footer );
wp_enqueue_style
wp_enqueue_style( $handle, $src, $deps, $ver, $media );
A safe way to add/enqueue a stylesheet file to the WordPress generated page.
/* adds stylesheet file to the end of the queue */
/* Override all stylesheets in queue */

function wpdocs_override_stylesheets()
{
    $dir = plugin_dir_path(__FILE__);
    wp_enqueue_style('theme-override', $dir . '/theme-overrides.css', array(), '0.1.0', 'all');
}
add_action('wp_enqueue_scripts', 'wpdocs_override_stylesheets', PHP_INT_MAX);
/* Load an IE-specific stylesheet */

add_action( 'wp_enqueue_scripts', 'enqueue_my_styles' );
function enqueue_my_styles() {

    global $wp_styles;

    // Load the main stylesheet
    wp_enqueue_style( 'my-theme', get_stylesheet_uri() );

    /**
     * Load our IE-only stylesheet for all versions of IE:
     *
     *
     * NOTE: It is also possible to just check and see if the $is_IE global in WordPress is set to true before
     * calling the wp_enqueue_style() function.  If you are trying to load a stylesheet for all browsers
     * EXCEPT for IE, then you would HAVE to check the $is_IE global since WordPress doesn't have a way to
     * properly handle non-IE conditional comments.
     */
    wp_enqueue_style( 'my-theme-ie', get_stylesheet_directory_uri() . "/css/ie.css", array( 'my-theme' )  );
    $wp_styles->add_data( 'my-theme-ie', 'conditional', 'IE' );
}
This is a conditional loading of css file by page template (css will be loaded on on the pages with tamplate-name.php). You can change the condition by another one.
The code should be used in your theme’s function.php .
get_stylesheet_directory_uri() with get_stylesheet_uri().
$handle = 'wpdocs';
wp_register_style( $handle, get_stylesheet_directory_uri().'/relative/path/to/stylesheet.css', array(), '', true );
if ( is_page_template( 'template-name.php' ) ) {
    wp_enqueue_style( $handle );
}
Using this method you can enqueue a child theme’s style.css.
function my_theme_enqueue_styles() {

    $parent_style = 'jobcareertheme';

    wp_enqueue_style( $parent_style, get_template_directory_uri() . '/style.css' );
    wp_enqueue_style( 'child-style',
        get_stylesheet_directory_uri() . '/style.css',
        array( $parent_style ),
        wp_get_theme()->get('1.0.0')
    );
}
add_action( 'wp_enqueue_scripts', 'my_theme_enqueue_styles' );
wp_register_style
wp_enqueue_style and respective wp_register_style
Main difference between wp_enqueue_style and respective wp_register_style functions, is that the first adds scripts/styles to the queue, the second prepares scripts/styles to be added.
wp_register_style can be used in every hook, even in an early hook like init, but wp_enqueue_style should be used on wp_enqueue_scripts hook (or admin_enqueue_scripts for backend)
The typical scenario of using both functions is when you want to register scripts/styles on theme init, and then enqueue them conditionally on some pages, e.g.
add_action('init', 'my_register_styles');

function my_register_styles() {
    wp_register_style( 'style1', get_template_directory_uri() . '/style1.css' );
    wp_register_style( 'style2', get_template_directory_uri() . '/style2.css' );
    wp_register_style( 'style3', get_template_directory_uri() . '/style3.css' );
}

add_action( 'wp_enqueue_scripts', 'my_enqueue_styles' );

function my_enqueue_styles() {
    if ( is_front_page() ) {
        wp_enqueue_style( 'style3' );
    } elseif ( is_page_template( 'special.php' ) ) {
        wp_enqueue_style( 'style1' );
        wp_enqueue_style( 'style2' );
    } else {
        wp_enqueue_style( 'style1' );
    }
}
In this way the conditional enqueuing is more readable and less verbose.
In addition, if you want to enqueue one or more of the registered styles/scripts also in the backend, you can use the registered handle in a function hooking admin_enqueue_scripts without having to pass all params again.
Sure this is more useful for scripts, because of wp_localize_script that in previous scenario can be called once, after script registration, and then on conditional enqueuing just enqueue the script, even if it is used more than once: this keeps code simpler and DRY.
When you register a script/style and immediately after you enqueue it, it's just an unnecessary task, that actually can be completely avoided:
wp_register_style( 'style1', get_template_directory_uri() . '/style1.css' );
wp_enqueue_style( 'style1' );
There's no advantage to enqueuing a style (or script) in like this, just use wp_enqueue_style with all params of wp_enqueue_style and you are done.
However, what is very child theme friendly is to wrap the functions that enqueue and/or register styles and scripts in a if ( ! function_exists( ... in this way child theme can overwrite parent theme styles and scripts all in one place:
if ( ! function_exists( 'my_register_styles' ) ) {
    function my_register_styles() {
        wp_register_style( 'style1', get_template_directory_uri() . '/style1.css' );
        wp_register_style( 'style2', get_template_directory_uri() . '/style2.css' );
        wp_register_style( 'style3', get_template_directory_uri() . '/style3.css' );
    }
}

if ( ! function_exists( 'my_enqueue_styles ') ) {
    function my_enqueue_styles() {
        if ( is_front_page() ) {
            wp_enqueue_style( 'style3' );
        } elseif ( is_page_template( 'special.php' ) ) {
            wp_enqueue_style( 'style1' );
            wp_enqueue_style( 'style2' );
        } else {
            wp_enqueue_style( 'style1' );
        }
    }
}
Removing Scripts And Styles
WordPress provides dequeueing and deregistering functions for both scripts and styles.
- wp_deregister_script()
- wp_deregister_style()
- wp_dequeue_script()
- wp_dequeue_style()
These function allow us to remove assets modularly. The following example shows how jQuery can easily be removed and replaced by a more recent version.
function my_assets() {
	wp_deregister_script( 'jquery' );
	wp_register_script( 'jquery', get_template_directory_uri() . '/jquery-latest.js' );
}

add_action( 'wp_enqueue_scripts', 'my_assets' );
Disable WordPress Image Sizes - How-to+
+
comments_template()/
comments_open()
get_comments_number()
	/**
	 *  Output comments wrapper if it's a post, or if comments are open,
	 * or if there's a comment number – and check for password.
	 * */
<?php
if ( ( is_single() || is_page() ) && ( comments_open() || get_comments_number() ) && ! post_password_required() ) {
		?>

		<div class="comments-wrapper section-inner">

			<?php comments_template(); ?>

		</div>

		<?php
	}
?>
What is a Template Tag?
A template tag is simply a piece of code that tells WordPress to get something from the database. It is broken up into three components:
- A PHP code tag
- A WordPress function
- Optional parameters
Read all about Template Tags from Wordpress Codex
Using Template Tags Within the Loop Using Template Tags Within the Loop
Many template tags work within the WordPress Loop. This means that they are included in the template files as part of the php “loop” that generates the pages users see based upon the instructions inside of the loop.
  The WordPress loop begins with:

	if ( have_posts() ) :
		while ( have_posts() ) :
			the_post();

		//Template tags that work within the loop must be in the middle area,
		//before the ending section of the loop below:

		 endwhile;
	 else :
		 _e( 'Sorry, no posts matched your criteria.', 'devhub' );
	 endif;
Some of template tags that need to be inside of the loop include
The main reason why some functions require the loop is because they require the global post object to be set.
If the template tag you want to use doesn’t have to be within the loop
then you can put it in any file you’d like, for instance in the sidebar, header, or footer template files.
These are functions that typically do not require the global post object.
Some Useful Tags
- get_header() tells WordPress to get the header.php file and include it in the current theme file.
- get_footer() tells WordPress to get the footer.php file.
- the_title() – tells WordPress to get the title of the page or post from the database and include it.
- bloginfo( 'name' ) – tells WordPress to get the blog title out of the database and include it in the template file.
next_post_link()– a link to the post published chronologically after the current postprevious_post_link()– a link to the post published chronologically before the current postthe_category()– the category or categories associated with the post or page being viewedthe_author()– the author of the post or pagethe_content()– the main content for a post or pagethe_excerpt()– the first 55 words of a post’s main content followed by an ellipsis (…) or read more link that goes to the full post. You may also use the “Excerpt” field of a post to customize the length of a particular excerpt.the_ID()– the ID for the post or pagethe_meta()– the custom fields associated with the post or pagethe_shortlink()– a link to the page or post using the url of the site and the ID of the post or pagethe_tags()– the tag or tags associated with the postthe_title()– the title of the post or pagethe_time()– the time or date for the post or page. This can be customized using standard php date function formatting.- get_template_part() -
get_template_part( 'nav' );           // Navigation bar (nav.php)
get_template_part( 'nav', '2' );      // Navigation bar #2 (nav-2.php)
get_template_part( 'nav', 'single' ); // Navigation bar to use in single pages (nav-single.php)

 // if you have a folder called “partials” in your theme directory and a
 // template part called “content-page.php” in that sub-folder.
 // get_template_part() has the ability to search one directory deep.
get_template_part( 'partials/content', 'page' );

// will include layout.php from template-parts subdirectory placed in the root of your theme folder.
get_template_part('template-parts/layout');
Parent Themes and Child Themes – get_template_part() understands the relationship between parent themes and child themes. When the function is used call a specific file, it will search for that file in an active child theme first. If it fails, it will then search for the same file in the parent theme.
<php if ( have_posts() ) : ?>
	<?php while ( have_posts() ) : the_post(); ?>
		... Display post content
	<?php endwhile; ?>
<?php endif; ?>
The loop should always be placed after the call to get_header(). For example:
<?php get_header(); ?>
<?php if ( have_posts() ) : while ( have_posts() ) : the_post(); ?>
    ... Display post content
<?php endwhile; endif; ?>
Tip: You can include a custom 404 “not found” message that will be displayed if no posts matching the specified criteria are available. The message must be placed between the endwhile and endif statements, as seen in examples below.
if ( have_posts() ) : while ( have_posts() ) : the_post();
        the_content();
    endwhile;
    else :
        _e( 'Sorry, no posts matched your criteria.', 'textdomain' );
 endif;
Style Posts from Some Categories Differently
The example below does a couple of things:
- First, it displays each post with its title, time, author, content, and category, similar to the individual post example above.
- Next, it makes it possible for posts with the category ID of “3” to be styled differently, utilizing the in_category() template tag.
Code comments in this example provide details throughout each stage of the loop:
// Start the Loop.
<?php if ( have_posts() ) : while ( have_posts() ) : the_post();
/* * See if the current post is in category 3.
   * If it is, the div is given the CSS class "post-category-three".
   * Otherwise, the div is given the CSS class "post".
*/
if ( in_category( 3 ) ) : ?>

<div class="post-category-three">
    <?php else : ?>
<div class="post">
    <?php endif; ?>

        // Display the post's title.
        <h2><?php the_title() ?></h2>

        // Display a link to other posts by this posts author.
        <small><?php _e( 'Posted by ', 'textdomain' ); the_author_posts_link() ?></small>

        // Display the post's content in a div.
        <div class="entry">
            <?php the_content() ?>
        </div>

        // Display a comma separated list of the post's categories.
        <?php _e( 'Posted in ', 'textdomain' ); the_category( ', ' ); ?>

    // closes the first div box with the class of "post" or "post-cat-three"
    </div>

// Stop the Loop, but allow for a "if not posts" situation
<?php endwhile; else :
/*
 * The very first "if" tested to see if there were any posts to
 * display. This "else" part tells what do if there weren't any.
 */
_e( 'Sorry, no posts matched your criteria.', 'textdomain' );
 // Completely stop the Loop.
 endif;
?>
Multiple Loops
In some situations, you may need to use more than one loop. For example you may want to display the titles of the posts in a table of content list at the top of the page and then display the content further down the page. Since the query isn’t being changed we simply need to rewind the loop when we need to loop through the posts for a second time. For that we will use the function rewind_posts().
Using rewind_posts()
You can use rewind_posts() to loop through the same query a second time. This is useful if you want to display the same query twice in different locations on a page.
Here is an example of rewind_posts() in use:
// Start the main loop
<?php
    if ( have_posts() ) : while ( have_posts() ) : the_post();
        the_title();
    endwhile;
    endif;

    // Use rewind_posts() to use the query a second time.
    rewind_posts();

    // Start a new loop
    while ( have_posts() ) : the_post();
        the_content();
    endwhile;
?>
Creating secondary queries and loops
Using two loops with the same query was relatively easy but not always what you will need. Instead, you will often want to create a secondary query to display different content on the template. For example, you might want to display two groups of posts on the same page, but do different things to each group. A common example of this, as shown below, is displaying a single post with a list of posts from the same category below the single post.
<?php
    // The main query.
    if ( have_posts() ) : while ( have_posts() ) : the_post();
        the_title();
        the_content();
    endwhile;
    else :
        // When no posts are found, output this text.
        _e( 'Sorry, no posts matched your criteria.' );
    endif;
    wp_reset_postdata();

    /*
     * The secondary query. Note that you can use any category name here. In our example,
     * we use "example-category".
     */
    $secondary_query = new WP_Query( 'category_name=example-category' );

    // The second loop. if ( $secondary_query->have_posts() )
    echo '<ul>';
    while ( $secondary_query->have_posts() ) :
        $secondary_query->the_post();
        echo '<li>' . get_the_title() . '</li>';
    endwhile;
    echo '</ul>';
    endif;
wp_reset_postdata();
?>
As you can see in the example above, we first display a regular loop. Then we define a new variable that uses WP_Query to query a specific category; in our case, we chose the example-category slug.
Note that the regular loop in the example above has one difference: it calls wp_reset_postdata() to reset the post data. Before you can use a second loop, you need to reset the post data. There are two ways to do this:
- By using the rewind_posts() function; or
- By creating new query objects.
Resetting multiple loops
It’s important when using multiple loops in a template that you reset them. Not doing so can lead to unexpected results due to how data is stored and used within the global $post variable. There are three main ways to reset the loop depending on the way they are called.
Using wp_reset_postdata()
Use wp_reset_postdata() when you are running custom or multiple loops with WP_Query. This function restores the global $post variable to the current post in the main query. If you’re following best practices, this is the most common function you will use to reset loops.
To properly use this function, place the following code after any loops with WP_Query:
<?php wp_reset_postdata(); ?>
Here is an example of a loop using WP_Query that is reset with wp_reset_postdata().
<?php
// Example argument that defines three posts per page.
$args = array( 'posts_per_page' => 3 );

// Variable to call WP_Query.
$the_query = new WP_Query( $args );

if ( $the_query->have_posts() ) :
    // Start the Loop
    while ( $the_query->have_posts() ) : $the_query->the_post();
        the_title();
        the_excerpt();
    // End the Loop
    endwhile;
else:
    // If no posts match this query, output this text.
    _e( 'Sorry, no posts matched your criteria.', 'textdomain' );
endif;
wp_reset_postdata();
 ?>
Using wp_reset_query()
Using wp_reset_query() restores the WP_Query and global $post data to the original main query. You MUST use this function to reset your loop if you use query_posts()within your loop. You can use it after custom loops with WP_Query because it actually calls wp_reset_postdata() when it runs. However, it’s best practice to use wp_reset_postdata() with any custom loops involving WP_Query.
Alert: query_posts() is not best practice and should be avoided if at all possible. Therefore, you shouldn’t have much use for wp_reset_query().
To properly use this function, place the following code after any loops with query_posts().
<?php wp_reset_query(); ?>
codex.wordpress.org/Conditional_Tags
developer.wordpress.org/themes/basics/conditional-tags/
Conditional Tags usually work with PHP if /else Conditional Statements.
if ( is_user_logged_in() ):
    echo 'Welcome, registered user!';
else:
    echo 'Welcome, visitor!';
endif;
For a Conditional Tag to modify your data, the information must already have been retrieved from your database, i.e. the query must have already run. If you use a Conditional Tag before there is data, there’ll be nothing to ask the if/else statement about.
It’s important to note that WordPress loads functions.php before the query is run, so if you simply include a Conditional Tag in that file, it won’t work.
Two ways to implement Conditional Tags:
- place it in a Template File
- create a function out of it in functions.php that hooks into an action/filter that triggers at a later point
- is_home() – Returns true if the current page is the homepage. This condition returns true when the main blog page is being displayed, usually in standard reverse chronological order. If your home page has been set to a Static Page instead, then this will only prove true on the page which you set as the “Posts page” in Settings > Reading.
- is_front_page() - This condition returns true when the front page of the site is displayed, regardless of whether it is set to show posts or a static page.
Returns true when:
- the main blog page is being displayed and
- the Settings > Reading -> Front page displays option is set to Your latest posts
OR
- when Settings > Reading -> Front page displays is set to A static page and
- the Front Page value is the current Page being displayed.
- is_admin() – Returns true if inside Administration Screen, false otherwise. This condition returns true when the Dashboard or the administration panels are being displayed. Does not check if the user is an administrator; current_user_can() for checking roles and capabilities.
if ( ! is_admin() ) { // Runs only if this PHP code is in a file that displays outside the admin panels, like the theme template. echo 'Welcome to our website.'; } else { // Runs only if this code is in a file that displays inside the admin panels, like a plugin file. echo 'Welcome to your Admin Panels.'; } - is_single() – Returns true if the page is currently displaying a single post.
is_single();
// When any single Post page is being displayed.

is_single('17');
// When Post 17 (ID) is being displayed.

is_single(17);
// When Post 17 (ID) is being displayed. Integer parameter also works
is_single('Irish Stew');
// When the Post with post_title of "Irish Stew" is being displayed.

is_single('beef-stew');
// When the Post with post_name (slug) of "beef-stew" is being displayed.

is_single(array(17,'beef-stew','Irish Stew'));
// Returns true when the single post being displayed is either post ID 17,
// or the post_name is "beef-stew", or the post_title is "Irish Stew".
// Note: the array ability was added in version 2.5.
Although is_single() will usually return true for attachments, this behavior should not be relied upon. It is possible for $is_page and $is_attachment to be true at the same time, and in that case $is_single will be false. For this reason, you should use is_attachment() || is_single() if you want to include attachments, or use is_singular()if you want to include pages too.
- is_singular() - Returns true for any is_single, is_page, and is_attachment. It does allow testing for post types. The query for an existing single post of any post type (post, attachment, page, custom post types)
if ( is_singular() ) {
  // show adv. #1
} else {
  // show adv. #2
}
Custom Post Types When any of the following return true: is_single(), is_page() or is_attachment(). is_singular(); True when viewing a post of the Custom Post Type book. is_singular( 'book' ); True when viewing a post of the Custom Post Type newspaper or book. is_singular( array( 'newspaper', 'book' ) );
Default Post Type. True when viewing a regular post.

is_singular( 'post' );
- is_sticky()- Returns true if the “Stick this post to the front page” check box has been checked for the current post. In this example, no post ID argument is given, so the post ID for the Loop post is used.
is_sticky( ’17’ )
Returns true when Post 17 is considered a sticky post. - get_post_type( int|WP_Post|null $post = null )- Retrieves the post type of the current post or of a given post.
Default WordPress Post Type Names
Here are the default post type names. Use these as the parameter for this function to collect the post type object- post
- page
- attachment
- revision
- nav_menu_item
- is_page() – Returns true if the page is currently displaying a single page. This section refers to WordPress Pages, not any generic webpage from your blog, or in other words to the built in post_type ‘page’.
// When any single Page is being displayed.
is_page();

// When Page 42 (ID) is being displayed.
is_page( 42 );

// When the Page with a post_title of "Contact" is being displayed.
is_page( 'Contact' );

// When the Page with a post_name (slug) of "about-me" is being displayed.
is_page( 'about-me' );

/*
 * Returns true when the Pages displayed is either post ID 42,
 * or post_name "about-me", or post_title "Contact".
 * Note: the array ability was added in version 2.5.
 */
is_page( array( 42, 'about-me', 'Contact' ) );// When any single Page is being displayed.
is_page();

// When Page 42 (ID) is being displayed.
is_page( 42 );

// When the Page with a post_title of "Contact" is being displayed.
is_page( 'Contact' );

// When the Page with a post_name (slug) of "about-me" is being displayed.
is_page( 'about-me' );

/*
 * Returns true when the Pages displayed is either post ID 42,
 * or post_name "about-me", or post_title "Contact".
 * Note: the array ability was added in version 2.5.
 */
is_page( array( 42, 'about-me', 'Contact' ) );
$paged = $wp_query->get( 'paged' ); if ( ! $paged || $paged < 2 ) { // This is not a paginated page (or its simply the first page of a paginated page/post) } else { // This is a paginated page. } - is_page_template() – Can be used to determine if a page is using a specific template, for example: is_page_template('about-page.php')
is_page_template( 'templates/about.php' ); // Page template in subdirectory
Cannot Be Used Inside The Loop
Due to certain global variables being overwritten during The Loop is_page_template() will not work. In order to use it after The Loop you must call wp_reset_query() after The Loop.
if ( is_page_template( 'about.php' ) ) {
    // about.php is used
} else {
    // about.php is not used
}
if ( is_page_template( array( 'template-full-width.php', 'template-product-offers.php' ) ) ) { // Do Something here if either of the above templates are being used } else { // Else do this } - is_category() – When a Category archive page is being displayed. Returns true if page or post has the specified category, for example:
is_category('news')is_category(); // When any Category archive page is being displayed. is_category( '9' ); // When the archive page for Category 9 is being displayed. is_category( 'Stinky Cheeses' ); // When the archive page for the Category with Name "Stinky Cheeses" is being displayed. is_category( 'blue-cheese' ); // When the archive page for the Category with Category Slug "blue-cheese" is being displayed. is_category( array( 9, 'blue-cheese', 'Stinky Cheeses' ) ); // Returns true when the category of posts being displayed is either term_ID 9, // or slug "blue-cheese", or name "Stinky Cheeses".
- in_category() - Check if the current post is within any of the given categories. Categories given as integers will only be checked against the post’s categories’ term_ids. Return boolean value.
During a request for an individual post (usually handled by the single.php template), you can test that post’s categories even before the Loop is begun.
if ( in_category('fruit') ) { // Testing the current post outside the Loop
    include 'single-fruit.php';
} elseif ( in_category('vegetables') ) {
    include 'single-vegetables.php';
} else {
    // Continue with normal Loop
    if ( have_posts() ) : while ( have_posts() ) : the_post();
    // ...
}
Testing the current post within the Loop
in_category() is often used to take different actions within the Loop depending on the current post’s category, e.g.
if ( in_category( 'pachyderms' )) {
    // They have long trunks...
} elseif ( in_category( array( 'Tropical Birds', 'small-mammals' ) )) {
    // They are warm-blooded...
} else {
    // etc.
}
!in_category( array( 4, 5, 6 ) )
Returns true if the current post is NOT in either category 4, 5, or 6. Note the ! at the beginning.
- is_tag() – Returns true if a page or post has the specified tag.
// When any Tag archive page is being displayed.
is_tag();

// When the archive page for Tag 30 is being displayed.
is_tag( '30' );

// When the archive page for tag with the Slug of 'extreme' is being displayed.
is_tag( 'extreme' );

// When the archive page for tag with the Name of 'mild' is being displayed.
is_tag( 'mild' );

/*
 * Returns true when the tag of posts being displayed is either term_ID 30,
 * or slug "extreme", or name "mild". Note: the array ability was added
 * at Version 3.7.
 */
is_tag( array( 30, 'mild', 'extreme' ) );
- has_tag() – Check if the current post has any of given tags. The given tags are checked against the post’s tags’ term_ids, names and slugs. Tags given as integers will only be checked against the post’s tags’ term_ids. If no tags are given, determines if post has any tags.
If Post has tag, show them. Else if Post has category, show category. Otherwise do other.
if(has_tag()) {

      the_tags(); //show tags

} elseif(has_category()) {

      the_category(); //show category

} else {
      //do something different
}
has_tag( ‘mild’ ) When the current post has the tag ‘mild’. has_tag( array( ‘sharp’, ‘mild’, ‘extreme’ ) ) When the current post has any of the tags in the array.
- has_nav_menu( string $location ) – Determines whether a registered nav menu location has a menu assigned to it.
if ( has_nav_menu( 'primary' ) ) { wp_nav_menu( array( 'theme_location' => 'primary' ) ); } - –
- –
- is_author() – Returns true if inside author’s archive page
- is_search() – Returns true if the current page is a search results page
- is_404() – Returns true if the current page does not exist
- has_excerpt() – Returns true if the post or page has an excerpt
- -
- -
Navigation Menus +
Custom navigation menus allow users to edit and customize menus in the Menus admin panel, giving users a drag-and-drop interface to edit the various menus in their theme.
Each of the menus you define can be called later using wp_nav_menu() and using the name assigned (i.e. primary) as the theme_location parameter.
Register Menus
In your theme’s functions.php, you need to register your menu(s). This sets the name that will appear at Appearance -> Menus.
// for registering single menu
function register_my_menu() {
  register_nav_menu('header-menu',__( 'Header Menu' ));
}
add_action( 'init', 'register_my_menu' );
For multiple menu, you will use register_nav_menus() to register the menu.
In this example, two locations are added to the “Manage Locations” tab: “Header Menu” and “Extra Menu”.
function register_my_menus() {
	register_nav_menus(
		array(
		  'header-menu' => __( 'Header Menu' ),
		  'extra-menu' => __( 'Extra Menu' )
		 )
	);
}
add_action( 'init', 'register_my_menus' );
This function automatically registers custom menu support for the theme, therefore you do not need to call add_theme_support( 'menus' );
add_action( 'after_setup_theme', 'register_custom_nav_menus' );
function register_custom_nav_menus() {
	register_nav_menus( array(
		'pluginbuddy_mobile' => 'PluginBuddy Mobile Navigation Menu',
		'footer_menu' => 'My Custom Footer Menu',
	) );
}
register_nav_menus(
			array(
				'menu-1' => __( 'Primary', 'twentynineteen' ),
				'footer' => __( 'Footer Menu', 'twentynineteen' ),
				'social' => __( 'Social Links Menu', 'twentynineteen' ),
			)
		);
Display Menus
Once you’ve registered your menus, you need to use wp_nav_menu() to tell your theme where to display them. For example, add the following code to your header.php file to display the header-menu that was registered above.
<?php wp_nav_menu(); ?>
Your unordered list would have the class name ‘menu’ with each list item having its own CSS class.
This might work if you only have one menu location. However, most themes have multiple locations where you can display navigation menus.
Using only the default CSS class may cause conflict with menus on other locations.
This is why you need to define CSS class and menu location as well. Chances are that your WordPress theme is already doing that by adding the navigation menus using a code like this:
wp_nav_menu( array(
        'theme_location' => 'primary',
        'menu_class'     => 'primary-menu',
         ) );
This code tells WordPress that this is where the theme displays primary menu. It also adds a CSS class primary-menu to the navigation menu.
Style your navigation menu using this CSS structure+
// container class
#header .primary-menu{}

// container class first unordered list
#header .primary-menu ul {}

//unordered list within an unordered list
#header .primary-menu ul ul {}

 // each navigation item
#header .primary-menu li {}

// each navigation item anchor
#header .primary-menu li a {}

// unordered list if there is drop down items
#header .primary-menu li ul {}

// each drop down navigation item
#header .primary-menu li li {}

// each drap down navigation item anchor
#header .primary-menu li li a {}
Note: A full list of parameters and CSS Classes can be found in the wp_nav_menu() page in the function reference. You can use these to style your menus.
Repeat this process for any additional menus you want to display in your theme. Optionally, you can add a container class which allows you to style the menu with CSS.
wp_nav_menu(
	array(
	'theme_location' => 'extra-menu',
	'container_class' => 'my_extra_menu_class'
	)
);
Display Additional Contents
Below is a simplified version of the Twenty Seventeen footer social menu, which displays span elements before and after the menu item label text.
wp_nav_menu(
	  array(
		'menu' => 'primary',
		'link_before' => '<span class="screen-reader-text">',
		'link_after' => '</span>',
	  )
);
The output will display as…
<div class="menu-social-container">
  <ul id="menu-social">
    <li id="menu-item-1">
      <a href="http://twitter.com/"><span class="screen-reader-text">Twitter</span>
    </li>
  </ul>
</div>
Note: To display text between the <li> and <a> elements for each menu item, use before and after parameters.
Parameters+
wp_nav_menu( array $args = array() )
- 'menu'
(int|string|WP_Term) Desired menu. Accepts a menu ID, slug, name, or object. - 'menu_class'
(string) CSS class to use for the ul element which forms the menu. Default 'menu'. - 'menu_id'
(string) The ID that is applied to the ul element which forms the menu. Default is the menu slug, incremented. - 'container'
(string) Whether to wrap the ul, and what to wrap it with. Default 'div'. - 'container_class'
(string) Class that is applied to the container. Default 'menu-{menu slug}-container'. - 'container_id'
(string) The ID that is applied to the container. - 'fallback_cb'
(callable|bool) If the menu doesn't exists, a callback function will fire. Default is 'wp_page_menu'. Set to false for no fallback. - 'before'
(string) Text before the link markup. - 'after'
(string) Text after the link markup. - 'link_before'
(string) Text before the link text. - 'link_after'
(string) Text after the link text. - 'echo'
(bool) Whether to echo the menu or return it. Default true. - 'depth'
(int) How many levels of the hierarchy are to be included. 0 means all. Default 0. - 'walker'
(object) Instance of a custom walker class. - 'theme_location'
(string) Theme location to be used. Must be registered with register_nav_menu() in order to be selectable by the user. - 'items_wrap'
(string) How the list items should be wrapped. Default is a ul with an id and class. Uses printf() format with numbered placeholders. - 'item_spacing'
(string) Whether to preserve whitespace within the menu's HTML. Accepts 'preserve' or 'discard'. Default 'preserve'.
wp_nav_menu( array $args = array(
    'menu'              => "", // (int|string|WP_Term) Desired menu. Accepts a menu ID, slug, name, or object.
    'menu_class'        => "", // (string) CSS class to use for the ul element which forms the menu. Default 'menu'.
    'menu_id'           => "", // (string) The ID that is applied to the ul element which forms the menu. Default is the menu slug, incremented.
    'container'         => "", // (string) Whether to wrap the ul, and what to wrap it with. Default 'div'.
    'container_class'   => "", // (string) Class that is applied to the container. Default 'menu-{menu slug}-container'.
    'container_id'      => "", // (string) The ID that is applied to the container.
    'fallback_cb'       => "", // (callable|bool) If the menu doesn't exists, a callback function will fire. Default is 'wp_page_menu'. Set to false for no fallback.
    'before'            => "", // (string) Text before the link markup.
    'after'             => "", // (string) Text after the link markup.
    'link_before'       => "", // (string) Text before the link text.
    'link_after'        => "", // (string) Text after the link text.
    'echo'              => "", // (bool) Whether to echo the menu or return it. Default true.
    'depth'             => "", // (int) How many levels of the hierarchy are to be included. 0 means all. Default 0.
    'walker'            => "", // (object) Instance of a custom walker class.
    'theme_location'    => "", // (string) Theme location to be used. Must be registered with register_nav_menu() in order to be selectable by the user.
    'items_wrap'        => "", // (string) How the list items should be wrapped. Default is a ul with an id and class. Uses printf() format with numbered placeholders.
    'item_spacing'      => "", // (string) Whether to preserve whitespace within the menu's HTML. Accepts 'preserve' or 'discard'. Default 'preserve'.
) );
Define Callback
By default, WordPress displays the first non-empty menu when the specified menu or location is not found, or generates a Page menu when there is no custom menu selected. To prevent this, use the theme_location and fallback_cb parameters.
Examples+
  // functions.php
  register_nav_menus( array(
    'main' => __( 'Main Menu', 'mytheme' ),
  ) );


// somewhere in header.php
<header class="header">
  <nav class="nav">
    <?php
      if ( has_nav_menu( 'main' ) ) {
        wp_nav_menu( array(
          'theme_location' => 'main-menu',
          'container'      => '',
          'menu_class'     => 'navigation-main',
        ) );
      }
    ?>
  </nav>
</header>
We’ll assume our menu’s structure is as follows:
├── Home
├── Blog
|   ├── News
|   ├── Sports
|   ├── Fashion
|   |   ├── Article #1 Title
|   |   ├── Article #1 Title
|   ├── Business
├── About
└── Contact
So basically a menu of three levels (our final styles will support infinite nested levels). This would produce roughly the following markup:
<header class="header">
  <nav class="nav">
    <ul class="navigation-main">
      <li class="current-menu-item">
        <a href="#">Home</a>
      </li>
      <li class="menu-item-has-children">
        <a href="#">Blog</a>
        <ul>
          <li><a href="#">News</a></li>
          <li><a href="#">Sports</a></li>
          <li class="menu-item-has-children">
            <a href="#">Fashion</a>
            <ul>
              <li><a href="#">Article #1</a></li>
              <li><a href="#">Article #2</a></li>
            </ul>
          </li>
          <li><a href="#">Business</a></li>
        </ul>
      </li>
      <li><a href="#">About</a></li>
      <li><a href="#">Contact</a></li>
    </ul>
  </nav>
</header>
Add icons to your WordPress menu +
Menu Icons by ThemeIsle
Menu Image By Alex Davyskiba aka Zviryatko
How to Add Image Icons With Navigation Menus
Without Plugin
First, you need to visit Media » Add New to upload all your image icons in WordPress. Once uploaded, you need to copy their URLs and paste them in a text editor like Notepad.
Next, you need to go to Appearance » Menus and click on the ‘Screen Options‘ button at the top right corner of your screen. In the screen options, you need to check the ‘CSS Classes’ option.
.homeicon {
	background-image: url('http://www.example.com/wp-content/uploads/2018/09/home.png');
	background-repeat: no-repeat;
	background-position: left;
	padding-left: 5px;
}
Add login/logout button to the menu +
Add this code to function.php
function add_login_logout_link($items, $args) {
	$loginoutlink = wp_loginout('index.php', false);
	$items .= '<li>'. $loginoutlink .'</li>';
	return $items;
}
add_filter('wp_nav_menu_items', 'add_login_logout_link', 10, 2);
Create a shortcode and display WordPress menus anywhere you want+
Add this code to function.php
function menu_function($atts, $content = null) {
	extract(
		shortcode_atts(
			array( 'name' => null, ),
			$atts
			)
			);
			return wp_nav_menu(
			array(
			'menu' => $name,
			'echo' => false
		)
	);
}
add_shortcode('menu', 'menu_function');
Right after you save the changes, you will be able to display WordPress menus anywhere you want. All you have to do is to write down the shortcode where you have to specify the name of the menu you’re going to use:
[menu name=”main-menu”]
In most cases, your main menu will have the “main-menu” name attached to itself. But if you’re going to use any other menu, simply enter its name in the shortcode. You don’t have to know every menu name by heart; instead, navigate to Appearance -> Menus and browse through the list of menus or create new ones.
Since you’re now able to display WordPress menus practically anywhere, you can create numerous navigations which you’re going to use on your WordPress powered website. You can have one in a post, another one in template files, a Text Widget, etc.
How to add a search box to your WordPress menu +
Add this code to function.php
add_filter( 'wp_nav_menu_items','add_search_box', 10, 2 );
	function add_search_box( $items, $args ) {
	$items .= '<li>' . get_search_form( false ) . '</li>';
	return $items;
}
To be sure that the code will work for you, make sure that you have navigation menu already added to your site.
The code is pretty simple and its only function is to add the search box to your nav menu. Most probably, your search box won’t be aligned where you wanted it to be. That means you will have to tell WordPress where to put the search box:
Add a class to <li> tag found on the third line of code:
$items .= '<li class=”searchbox-position”>' . get_search_form( false ) . '</li>'
Add this code to stylesheet
.searchbox-position {
	margin-top: 15px;
	margin-right: 20px;
}
How to make navigation menu stick on top of the page+
Sticky Menu plugin
how-to-create-a-sticky-floating-navigation-menu-in-wordpress
Making Website More Userfriendly with Elementor Sticky Menu
Remove top-level menu items+
Add this code to function.php
if (!current_user_can( 'manage_options' )) {
	add_action( 'admin_menu', 'my_remove_menus', 999 );
}
function my_remove_menus() {
	remove_menu_page( 'index.php' );                  //Dashboard
	remove_menu_page( 'edit.php' );                   //Posts
	remove_menu_page( 'upload.php' );                 //Media
	remove_menu_page( 'edit.php?post_type=page' );    //Pages
	remove_menu_page( 'edit-comments.php' );          //Comments
	remove_menu_page( 'themes.php' );                 //Appearance
	remove_menu_page( 'plugins.php' );                //Plugins
	remove_menu_page( 'users.php' );                  //Users
	remove_menu_page( 'tools.php' );                  //Tools
	remove_menu_page( 'options-general.php' );        //Settings
}
As this code removes all of the top-level menus which you probably don’t want to do, feel free to modify the code to your needs. Each “remove_menu_page” line is in charge of removing one page
+
Menu Item CSS Classes +
The following classes are applied to menu items, i.e. to the HTML <li> tags, generated by wp_nav_menu():
.menu-item
This class is added to every menu item..menu-item-has-children
This class is added to menu item which has sub-items ..menu-item-object-{object}
This class is added to every menu item, where {object} is either a post type or a taxonomy..menu-item-object-category
This class is added to menu items that correspond to a category..menu-item-object-tag
This class is added to menu items that correspond to a tag..menu-item-object-page
This class is added to menu items that correspond to static pages..menu-item-object-{custom}
This class is added to menu items that correspond to a custom post type or a custom taxonomy..menu-item-type-{type}
This class is added to every menu item, where {type} is either “post_type” or “taxonomy”..menu-item-type-post_type
This class is added to menu items that correspond to post types: i.e. static pages or custom post types..menu-item-type-taxonomy
This class is added to menu items that correspond to taxonomies: i.e. categories, tags, or custom taxonomies.
Current-Page Menu Items
- .current-menu-item
This class is added to menu items that correspond to the currently rendered page.
Current-Page Parent Menu Items
- .current-menu-parent
This class is added to menu items that correspond to the hierarchical parent of the currently rendered page. - .current-{object}-parent
This class is added to menu items that correspond to the hierachical parent of the currently rendered object, where {object} corresponds to the the value used for .menu-item-object-{object}. - .current-{type}-parent
This class is added to menu items that correspond to the hierachical parent of the currently rendered type, where {type} corresponds to the the value used for .menu-item-type-{type}.
Current-Page Ancestor Menu Items
- .current-menu-ancestor
This class is added to menu items that correspond to a hierarchical ancestor of the currently rendered page. - .current-{object}-ancestor
This class is added to menu items that correspond to a hierachical ancestor of the currently rendered object, where {object} corresponds to the the value used for .menu-item-object-{object}. - .current-{type}-ancestor
This class is added to menu items that correspond to a hierachical ancestor of the currently rendered type, where {type} corresponds to the the value used for .menu-item-type-{type}.
Site Front Page Menu Items
- .menu-item-home
This class is added to menu items that correspond to the site front page.
See Also..
wp_page_menu +
Displays a list of WordPress Pages as links, and affords the opportunity to have Home added automatically to the list of Pages displayed. This Tag is useful to customize the Sidebar or Header, but may be used in other Templates as well.
wp_list_pages
Retrieve or display a list of pages (or hierarchical post type items) in list (li) format.
Admin Menu
add_action( 'admin_menu', 'extra_post_info_menu' );
function extra_post_info_menu() {
	$page_title = 'WordPress Extra Post Info';
	$menu_title = 'Extra Post Info';
	$capability = 'manage_options';
	$menu_slug  = 'extra-post-info';
	$function   = 'extra_post_info_page';
	$icon_url   = 'dashicons-media-code';
	$position   = 4;

	add_menu_page(
			$page_title,
			$menu_title,
			$capability,
			$menu_slug,
			$function,
			$icon_url,
			$position
			);
	}
| Variable name | Description |
|---|---|
| $page_title | The title shown in the web-browser when viewing your plugin page |
| $menu_title | The title for the menu button shown in the WordPress dashboard |
| $capability | manage_options allows only Super Admin and Administrator to view plugin |
| $menu_slug | URL to access plugin such as: /wp-admin/admin.php?page=extra-post-info |
| $function | The function that contains the code for what to actually display on your plugin page |
| $icon_url | Icon used in dashboard. You can use WordPress dash icons, or direct images like: $icon_url = plugins_url( ‘extra-post-info/icon.png’ ); |
| $position | Icon position in dashboard
WordPress position numbers: 2 Dashboard 4 Separator 5 Posts 10 Media 15 Links 20 Pages 25 Comments 59 Separator 60 Appearance 65 Plugins 70 Users 75 Tools 80 Settings 99 Separator |
| Function name | Description |
| add_menu_page | The WordPress function that hooks in and builds our plugin menu in the dashboard |
More Details....
How to Create Conditional Menus In WordPress
Hooks: Actions and Filters
Hooks are provided by WordPress to allow your plugin to 'hook into' the rest of WordPress; that is, to call functions in your plugin at specific times, and thereby set your plugin in motion. There are two kinds of hooks:
- Actions
- Filters
add_action(), do_action()
WordPress Hooks Actions and Filters Introduction Full Playlist Part -1
WordPress Actions and Filters: What's the Difference? - Tutplus
Basic Concept:
<div id="welcome_box">
   <h2>
      <?php welcome_user(); //function to welcome user on login ?>
   </h2>
</div>
//to welcome a user on login
function welcome_user() {
   echo "Welcome User!"
}
The lines of code above do not give us any flexibility to add or render any more data if we want so. What could be a better option is using do_action.
We can define action hook in our HTML or any function we are using. Here’s how:
<div id="welcome_box">
   <h2>
      <?php do_action( 'welcome_user' ); //action hook defined ?>
   </h2>
</div>
add_action( 'welcome_user','welcome_user' );
Callback welcome_user() attached with the action hook welcome_user
//to welcome a user on login
function welcome_user() {
   echo "Welcome User!"
}
Our code is now easily Customizable! Now, we want to add an additional message.
//callback to render additional message
function additional_message() {
    echo "Glad you're back!";
}
add_action( 'welcome_user', 'additional_message', 9);
welcome_user is the action hook, additional_message() is the callback attached and 9 is the priority (default is 10) as we want to call additional_message() before the default welcome_user() function.
add_action() attaches one or more callbacks to the action hook defined by do_action. It does NOT remove the default or any other callbacks running on the hook.
do_action() and add_action() also accept parameters. For example we can use user’s name in the welcome message:
<div id="welcome_box">
   <h2>
      <?php do_action( 'welcome_user', $username ); //action hook defined ?>
   </h2>
</div>
add_action( 'welcome_user','welcome_user', 10, 2 ); //10 is the priority and 2 is the number of arguments
//to welcome a user on login
function welcome_user($username) {
   echo "Welcome " .$username. "!"
}
Lastly, if you want to remove any callback (can be default callback as well) hooked to an action, you can use remove_action() and attach your callback using add_action(). Like this:
remove_action( 'welcome_user','additional_message','9' ); //removes the callback rendering additional message
do_action() vs add_action()
There are 3 steps for creating action hooks
/* Step 1. Creating a funcion for hook
function my_hooked_function() {
	echo 'Hey!';
}
/* Step 2. Defining the function to hook
add_action( 'my_action_name', 'my_hooked_function' );

/* Step 3. Executing that hook where we need */

do_action( 'my_action_name' );
It’s very similar to our previous code. In this case though, we don’t trigger an action via a do_action() call, but we use the action WordPress already provides.
function my_hooked_function() {
	echo 'Hey!';
}
add_action( 'wp_footer', 'my_hooked_function' );
function hooks_tutorial_init() {
	add_action( 'wp_footer', 'another_hooked_function', 11 );
	add_action( 'wp_footer', 'a_hooked_function', 10 );
}
add_action( 'init', 'hooks_tutorial_init' );

function a_hooked_function() {
	echo 'Hey!';
}

function another_hooked_function() {
	echo 'How are you this fine evening?';
}
Linking to Core Theme Files
As you’ve learned, WordPress themes are built from a number of different template files. At the very least this will usually include a sidebar.php, header.phpand footer.php. These are called using Template Tags, for example:
- get_header(); // header.php
- get_footer(); // footer.php
- get_sidebar(); // sidebar.php
You can create custom versions of these files can be called as well by naming the file sidebar-{your_custom_template}.php, header-{your_custom_template}.phpand footer-{your_custom_template}.php. You can then use Template Tags with the custom template name as the only parameter, like this:
get_header( 'your_custom_template' );
get_footer( 'your_custom_template' );
get_sidebar( 'your_custom_template' );
Multiple Headers
Different header for different pages.
<?php
if ( is_home() ) :
    get_header( 'home' );
elseif ( is_404() ) :
    get_header( '404' );
else :
    get_header();
endif;
?>

// The file names for the home and 404 headers should be header-home.php and header-404.php respectively.
Linking to Theme Directories
To link to the theme’s directory, you can use the following function:
If you are not using a child theme, this function will return the full URI to your theme’s main folder. You can use this to reference sub-folders and files in your theme like this:
echo get_theme_file_uri( 'images/logo.png' );
If you are using a child theme then this function will return the URI of the file in your child theme if it exists. If the file cannot be found in your child theme, the function will return the URI of the file in the parent theme. This is particularly important to keep in mind when distributing a theme or in any other case where a child theme may or may not be active.
In a child theme, you can link to a file URI or path in the parent theme’s directories using the following functions:
As with get_theme_file_uri() , you can reference sub-folders and files like this:
Take care when referencing files that may not be present, as these functions will return the URI or file path whether the file exists or not. If the file is missing, these functions will return a broken link.
Note: The functions get_theme_file_uri(), get_theme_file_path(), get_parent_theme_file_uri(), get_parent_theme_file_path() were introduced in WordPress 4.7.
For previous WordPress versions, use get_template_directory_uri(), get_template_directory(), get_stylesheet_directory_uri(), get_stylesheet_directory().
Take note that the newer 4.7 functions run the older functions anyway as part of the checking process so it makes sense to use the newer functions when possible.
Dynamic Linking in Templates
Regardless of your permalink settings, you can link to a page or post dynamically by referring to its unique numerical ID (seen in several pages in the admin interface) with
<a href="<?php echo get_permalink($ID); ?>">This is a link</a>
This is a convenient way to create page menus as you can later change page slugs without breaking links, as IDs will stay the same. However, this might increase database queries.
Remember that a WordPress website will not just have your theme active, it will also be using many different plugins. So that everything works harmoniously, it’s important that theme and plugins load scripts and stylesheets using the standard WordPress method.
Enqueuing Scripts and Styles
The proper way to add scripts and styles to your theme is to enqueue them in the functions.php files. The style.css file is required in all themes, but it may be necessary to add other files to extend the functionality of your theme.
Tip: WordPress includes a number of JavaScript files as part of the software package, including commonly used libraries such as jQuery. Before adding your own JavaScript, check to see if you can make use of an included library.
The basics are:
- Enqueue the script or style using wp_enqueue_script() or wp_enqueue_style()
Rather then loading the stylesheet in your header.php file, you should load it in using wp_enqueue_style. In order to load your main stylesheet, you can enqueue it in functions.php
To enqueue style.css
wp_enqueue_style( 'style', get_stylesheet_uri() );
		  // This will look for a stylesheet named “style” and load it from 2nd parameter where the source path mentioned
if you wanted to load a stylesheet named “slider.css” in a folder named “CSS” in you theme’s root directory, you would use:
wp_enqueue_style( 'slider', get_template_directory_uri() . '/css/slider.css');
Scripts
Any additional JavaScript files required by a theme should be loaded using wp_enqueue_script. This ensures proper loading and caching, and allows the use conditional tags to target specific pages.
Enqueue your script:
wp_enqueue_script( $handle, $src, $deps, $ver, $in_footer);
- $handle is the name for the script.
- $src defines where the script is located.
- $deps is an array that can handle any script that your new script depends on, such as jQuery.
- $ver lets you list a version number.
- $in_footer is a boolean parameter (true/false) that allows you to place your scripts in the footer of your HTML document rather then in the header, so that it does not delay the loading of the DOM tree.
Your enqueue function may look like this:
wp_enqueue_script( 'script', get_template_directory_uri() . '/js/script.js', array ( 'jquery' ), 1.1, true);
The Comment Reply Script
if ( is_singular() && comments_open() && get_option( 'thread_comments' ) ) {
    wp_enqueue_script( 'comment-reply' );
}
If comments are enabled by the user, and we are on a post page, then the comment reply script will be loaded. Otherwise, it will not.
Combining Enqueue Functions
It is best to combine all enqueued scripts and styles into a single function, and then call them using the wp_enqueue_scripts action. This function and action should be located somewhere below the initial setup.
function add_theme_scripts() {
  wp_enqueue_style( 'style', get_stylesheet_uri() );

  wp_enqueue_style( 'slider', get_template_directory_uri() . '/css/slider.css', array(), '1.1', 'all');

  wp_enqueue_script( 'script', get_template_directory_uri() . '/js/script.js', array ( 'jquery' ), 1.1, true);

    if ( is_singular() && comments_open() && get_option( 'thread_comments' ) ) {
      wp_enqueue_script( 'comment-reply' );
    }
}
add_action( 'wp_enqueue_scripts', 'add_theme_scripts' );
How to Load JavaScript & CSS Files Conditionally
if ( is_front_page() ):
  //your code here
else:
  //alternative code here
endif;

if ( !is_front_page() ):
  //your code here;
endif;
function mytheme_styles_scripts() {
  //main stylesheet, style.css
  wp_enqueue_style( 'style', get_stylesheet_uri() );

  //check we are on page with ID 1
  if ( is_page('1') ):

    //if we are, load styles and script
    //for portfolio page
    wp_enqueue_style( 'portfolio', get_template_directory_uri() . '/css/portfolio.css',false,null,'screen');

    //JS for portfolio section
    wp_enqueue_script( 'portfolio', get_template_directory_uri() . '/js/portfolio.js', array ( 'jquery' ), null, true);
  endif;
}

//hook the function to wp_enqueue_scripts action hook
add_action( 'wp_enqueue_scripts', 'mytheme_styles_scripts' );
Using the Page Title
Conditional tags for pages work with the page title too. If your portfolio page has a title of My Portfolio, the code could look like this (I just add the conditional part for brevity’s sake):
if ( is_page('My Portfolio') ):
  //rest of the code here

endif;
Using the Page Slug
You can use conditional tags with the page slug, which is the user friendly URL for that page. Here’s what it would look like in practice:
if ( is_page('my-portfolio') ):
  //rest of the code here

endif;
Page templates are a specific type of template file that can be applied to a specific page or groups of pages.
Note: As of WordPress 4.7 page templates support all post types.
Page templates can be selected by users through their admin screens.
For example, we can build page templates for:
- full-width, one-column
- two-column with a sidebar on the right
- two-column with a sidebar on the left
- three-column
Creating Custom Page Templates for Global Use
Alert: Important! Do not use page- as a prefix, as WordPress will interpret the file as a specialized template, meant to apply to only one page on your site.
Tip: A quick, safe method for creating a new page template is to make a copy of page.php and give the new file a distinct filename. That way, you start off with the HTML structure of your other pages and you can edit the new file as needed.
To create a global template, write an opening PHP comment at the top of the file that states the template’s name.
<?php /* Template Name: Full Width Page */ ?>
Once you upload the file to your theme’s folder (e.g., page-templates), go to the Page > Edit screen in your admin dashboard.
On the right hand side under attributes you’ll see template. This is where users are able to access your global page templates.
Tip: The select list has a maximum width of 250px, so longer names may be cut off.
Creating a Custom Page Template for One Specific Page
As mentioned in the Template Hierarchy page, you can create a template for a specific page. To create a template for one specific page, copy your existing page.phpfile and rename it with your page’s slug or ID:
- page-{slug}.php
- page-{ID}.php
For example: Your About page has a slug of ‘about’ and an ID of 6. If your active theme’s folder has a file named page-about.php or page-6.php, then WordPress will automatically find and use that file to render the About page.
Creating page templates for specific post types
By default, a custom page template will be available to the “page” post type.
To create a page template to specific post types, add a line under the template name with the post types you would like the template to support.
Creating page templates for specific post types
By default, a custom page template will be available to the “page” post type.
To create a page template to specific post types, add a line under the template name with the post types you would like the template to support.
<?php
/*
Template Name: Full-width layout
Template Post Type: post, page, event
*/
// Page code here...
Alert: This ability to add page templates to post types other than “page” post type is supported only from WordPress 4.7
When at least one template exists for a post type, the ‘Post Attributes’ meta box will be displayed in the back end, without the need to add post type support for ‘page-attributes’ or anything else. The ‘Post Attributes’ label can be customzied per post type using the ‘attributes’ label when registering a post type.
Using Conditional Tags in Page Templates
You can make smaller, page-specific changes with Conditional Tags in your theme’s page.php file. For instance, the below example code loads the file header-home.php for your front page, but loads another file (header-about.php) for your About page, and then applies the default header.php for all other pages.
if ( is_front_page() ) :
    get_header( 'home' );
elseif ( is_page( 'About' ) ) :
    get_header( 'about' );
else:
    get_header();
endif;
A sidebar is any widgetized area of your theme. Widget areas are places in your theme where users can add their own widgets. You do not need to include a sidebar in your theme, but including a sidebar means users can add content to the widget areas through the Customizer or the Widgets Admin Panel.
To use sidebars, you must register them in functions.php.
To begin, register_sidebar() has several parameters that should always be defined regardless of whether they are marked as optional.
- name – your name for the sidebar. This is the name users will see in the Widgets panel.
- id – must be lowercase. You will call this in your theme using the
dynamic_sidebarfunction. - description – A description of the sidebar. This will also be shown in the admin Widgets panel.
- class – The CSS class name to assign to the widget’s HTML.
- before_widget – HTML that is placed before every widget.
- after_widget – HTML that is placed after every widget. Should be used to close tags from
before_widget. - before_title – HTML that is placed before the title of each widget, such as a header tag.
- after_title – HTML that is placed after every title. Should be used to close tags from
before_title.
To register a sidebar we use register_sidebar and the widgets_init function.
function themename_widgets_init() {
    register_sidebar( array(
        'name'          => __( 'Primary Sidebar', 'theme_name' ),
        'id'            => 'sidebar-1',
        'before_widget' => '<aside id="%1$s" class="widget %2$s">',
        'after_widget'  => '</aside>',
        'before_title'  => '<h1 class="widget-title">',
        'after_title'   => '</h1>',
    ) );

    register_sidebar( array(
        'name'          => __( 'Secondary Sidebar', 'theme_name' ),
        'id'            => 'sidebar-2',
        'before_widget' => '<ul><li id="%1$s" class="widget %2$s">',
        'after_widget'  => '',
        'before_title'  => '<h3 class="widget-title">',
        'after_title'   => '</h3>',
    ) );
}
add_action( 'widgets_init', 'themename_widgets_init' );
function creates_widgets ($name,$id,$description){

}
Registering a sidebar tells WordPress that you’re creating a new widget area in Appearance > Widgets that users can drag their widgets to. There are two functions for registering sidebars:
The first lets you register one sidebar and the second lets you register multiple sidebars.
Tip: It is recommended that you register sidebars individually as it allows you to give unique and descriptive names to each sidebar.
For widget areas in header and footer, it makes sense to name them “Header Widget Area” and “Footer Widget Area”, rather than “Sidebar 1” and “Sidebar 2” (which is the default). This provides a useful description of where the sidebar is located.
The following code, added to functions.php registers a sidebar:
add_action( 'widgets_init', 'my_register_sidebars' );
function my_register_sidebars() {
    /* Register the 'primary' sidebar. */
    register_sidebar(
        array(
            'id'            => 'primary',
            'name'          => __( 'Primary Sidebar' ),
            'description'   => __( 'A short description of the sidebar.' ),
            'before_widget' => '<div id="%1$s" class="widget %2$s">',
            'after_widget'  => '</div>',
            'before_title'  => '<h3 class="widget-title">',
            'after_title'   => '</h3>',
        )
    );
    /* Repeat register_sidebar() code for additional sidebars. */
}
The code does the following:
register_sidebar– tells WordPress that you’re registering a sidebar'name' => __( 'Primary Widget Area', 'mytheme' ),– is the widget area’s name that will appear in Appearance > Widgets'id' => 'sidebar-1'– assigns an ID to the sidebar. WordPress uses ‘id’ to assign widgets to a specific sidebar.before_widget/after_widget– a wrapper element for widgets assigned to the sidebar. The “%1$s” and “%2$s” should always be left inidandclassrespectively so that plugins can make use of them. By default, WordPress sets these as list items but in the above example they have been altered to div.before_title/after_title– the wrapper elements for the widget’s title. By default, WordPress sets it to h2 but using h3 makes it more semantic.
Once your sidebar is registered, you can display it in your theme.
Displaying Sidebars in your Theme
Now that your sidebars are registered, you will want to display them in your theme. To do this, there are two steps:
- Create the sidebar.php template file and display the sidebar using the dynamic_sidebar function
- Load in your theme using the get_sidebar function
Create a Sidebar Template File
A sidebar template contains the code for your sidebar. WordPress recognizes the file sidebar.php and any template file with the namesidebar-{name}.php . This means that you can organize your files with each sidebar in its own template file.
1. Create sidebar-primary.php
2. Add the following code:
<div id="sidebar-primary" class="sidebar">
    <?php dynamic_sidebar( 'primary' ); ?>
</div>
Note that dynamic_sidebar takes a single parameter of $index, which can be either the sidebar’s name or id.
Load your Sidebar
To load your sidebar in your theme, use the get_sidebar function. This should be inserted into the template file where you want the sidebar to display. To load the default sidebar.php use the following:
<?php get_sidebar(); ?>
To display the Primary sidebar, pass the $name parameter to the function:
<?php get_sidebar( 'primary' ); ?>
Display Default Sidebar Content
You may wish to display content if the user hasn’t added any widgets to the sidebar yet. To do this, you use the is_sidebar_active() function to check to see if the sidebar has any widgets. This accepts the $index parameter which should be the ID of the sidebar that you wish to check.
This code checks to see if the sidebar is active, if not it displays some content:
<div id="sidebar-primary" class="sidebar">
    <?php if ( is_active_sidebar( 'primary' ) ) : ?>
        <?php dynamic_sidebar( 'primary' ); ?>
    <?php else : ?>

    <?php endif; ?>
</div>
Display Default Widgets
<div id="primary" class="sidebar">
    <?php do_action( 'before_sidebar' ); ?>
    <?php if ( ! dynamic_sidebar( 'sidebar-primary' ) ) : ?>
        <aside id="search" class="widget widget_search">
           <?php get_search_form(); ?>
        </aside>
        <aside id="archives" class"widget">
            <h1 class="widget-title"><?php _e( 'Archives', 'shape' ); ?></h1>
            <ul>
                <?php wp_get_archives( array( 'type' => 'monthly' ) ); ?>
            </ul>
        </aside>
        <side id="meta" class="widget">
            <h1 class="widget-title"><?php _e( 'Meta', 'shape' ); ?>
			</h1>
            <ul>
                <?php wp_register(); ?>
                <li><?php wp_loginout(); ?><li>
                <?php wp_meta(); ?>
           </ul>
        </aside>
   <?php endif; ?>
</div>
Display Nothing If Your Sidebar Is Empty
We can use the function is_active_sidebar() to check if there are any widgets active. Like dynamic_sidebar(), this function accepts one parameter, $index. Be sure to use the ID of the sidebar in this parameter.
<?php if ( is_active_sidebar( 'new-sidebar' ) ) : ?>
<div class="sidebar new-sidebar">
<?php dynamic_sidebar( 'new-sidebar' ); ?>
</div>
<?php endif; ?>
Display Default Content If Your Sidebar Is Empty
This time, instead of not displaying the empty sidebar, we add an else statement to run if there are no widgets active in the sidebar. You can place anything you like here, even another function.
			<div class="sidebar new-sidebar">
			   <?php if ( is_active_sidebar( 'new_sidebar' ) ) : ?>
				  <?php dynamic_sidebar( 'new_sidebar' ); ?>
			   <?php else : ?>

			   <?php endif; ?>
			</div>
Using Sidebar Templates
The WordPress function, get_sidebar() grabs the template file sidebar.php and uses it for page layout. But you can take the code for any dynamic sidebar, put it in a template file and call it with get_sidebar() as well.
Simply name the template sidebar-[name of sidebar here].php. For our example, this would be sidebar-new-sidebar.php. Calling it in your theme would look like this:
<?php get_sidebar('new-sidebar'); ?<
WordPress Widgets Tutorial
Video Tuts by LearnWebCode - Oct 2, 2014
Basic Concept+
You have two options while creating a widget; first, you can create a specific plugin to paste the widget codes. Second, paste the widget codes directly on the functions.php. fileof your theme. If you use theme function.php file to keep your widget code, it will active only when the theme is active.
Developing Widgets
To create and display a widget, you need to do the following:
- Create your widget’s class by extending the standard WP_Widget class and some of its functions.
- Register your widget so that it’s made available in the Widgets screen.
- Make sure that your theme has at least one widget area in which to add the widgets.
Widget Class
class My_Widget extends WP_Widget {

    public function __construct() {
        // actual widget processes
    }

    public function widget( $args, $instance ) {
        // outputs the content of the widget
    }

    public function form( $instance ) {
        // outputs the options form in the admin
    }

    public function update( $new_instance, $old_instance ) {
        // processes widget options to be saved
    }

}
The documentation for each of these functions can be found in the widget class code:
- construct: Set up your widget with a description, name, and display width in your admin.
- widget: Process the widget options and display the HTML on your page. The $args parameter provides the HTML you can use to display the widget title class and widget content class.
- form: Display the form that will be used to set the options for your widget. If your widget doesn’t have any options, you can skip this function (although it is still best practice to include it even if it’s empty).
- update: Save the widget options to the database. If your widget doesn’t have any options, you can skip this function (although it is still best practice to include it even if it’s empty).
Registering a Widget
The register_widget() function is used to register a widget.
Call this function using the widgets_init hook:
add_action( 'widgets_init', function() { register_widget( 'My_Widget' ); } );
add_action( 'widgets_init', 'My_New_widgets' );

/**
 * Register the new widget.
 *
 * @see 'widgets_init'
 */
function My_New_widgets() {
    register_widget( 'My_Widget' );
}
The HTML that wraps the widget, as well as the class for the title and widget content, is specified at the time you register the widget area using register_sidebar()
A Sample code for making widget. Use this code in function.php
// Register and load the widget
function kv_load_widget() {
    register_widget( 'kv_widget' );
}
add_action( 'widgets_init', 'kv_load_widget' );

// Creating the widget
class kv_widget extends WP_Widget {

function __construct() {
	parent::__construct(

	// Base ID of your widget
	'wpb_widget',

	// Widget name will appear in UI
	__('KV Custom Widget', 'kv_widget_domain'),

	// Widget description
	array( 'description' => __( 'Sample widget for learning', 'kv_widget_domain' ), )
	);
}

// Creating widget front-end

public function widget( $args, $instance ) {
	$title = apply_filters( 'widget_title', $instance['title'] );

	// before and after widget arguments are defined by themes
	echo $args['before_widget'];
	if ( ! empty( $title ) )
	echo $args['before_title'] . $title . $args['after_title'];

	// This is where you run the code and display the output
	echo __( 'Hello, World!', 'wpb_widget_domain' );
	echo $args['after_widget'];
}

// Widget Backend
public function form( $instance ) {
	if ( isset( $instance[ 'title' ] ) ) {
		$title = $instance[ 'title' ];
	}
	else {
		$title = __( 'New title', 'kv_widget_domain' );
	}
	// Widget admin form
	?>
	<p>
	<label for="<?php echo $this->get_field_id( 'title' ); ?>"><?php _e( 'Title:' ); ?></label>
	<input class="widefat" id="<?php echo $this->get_field_id( 'title' ); ?>"
	name="<?php echo $this->get_field_name( 'title' ); ?>" type="text" value="<?php echo esc_attr( $title ); ?>" />
	</p>
	<?php
}

// Updating widget replacing old instances with new
public function update( $new_instance, $old_instance ) {
	$instance = array();
	$instance['title'] = ( ! empty( $new_instance['title'] ) ) ? strip_tags( $new_instance['title'] ) : '';
	return $instance;
}
} // Class wpb_widget ends here
Advance Concept+
A widget adds content and features to a widget area (also called a sidebar). Widget areas provide a way for users to customize their site. A widget area can appear on multiple pages or on only one page. Your theme might have just one widget area or many of them.
A widget is a PHP object that outputs some HTML. The same kind of widget can be used multiple times on the same page (e.g. the Text Widget). Widgets can save data in the database (in the options table).
When you create a new kind of widget, it will appear in the user’s Administration Screens at Appearance > Widgets. The user can add the widget to a widget area and customize the widget settings from the WordPress admin.
Built-in versus stand-alone widgets
A set of widgets is included with the default WordPress installation. In addition to these standard widgets, extra widgets can be included by themes or plugins. An advantage of widgets built into themes or plugins is to provide extra features and increase the number of widgets.
A disadvantage is that if a theme is changed or a plugin is deactivated, the plugin or theme widget’s functionality will be lost. However, the data and preferences from the widget will be saved to the options table and restored if the theme or plugin is reactivated.
If you include a widget with your theme, it can only be used if that theme is active. If the user decides to change their theme they will lose access to that widget. However, if the widget is included with a plugin, the user can change their theme without losing access to the widget functionalit
Anatomy of a Widget
Visually, a widget comprises two areas:
- Title Area
- Widget Options
For example, here is the layout of the built-in text widget in the admin and on the front-end:
<div id="text-7" class="widget widget_text">
    <div class="widget-wrap">
        <h4 class="widgettitle">This is a text widget</h4>
        <div class="textwidget">
                   I can put HTML in here.
           <a href="http://google.com">Search me!</a>
        </div>
    </div>
</div>
Each widget has its own way of outputting HTML that is relevant to the data being displayed. The wrapper tags for the widget are defined by the widget area in which it is being displayed.
The PHP needed to create a widget like the built-in text widget looks like this:
class My_Widget extends WP_Widget {

    function __construct() {

        parent::__construct(
            'my-text',  // Base ID
            'My Text'   // Name
        );

        add_action( 'widgets_init', function() {
            register_widget( 'My_Widget' );
        });

    }

    public $args = array(
        'before_title'  => '<h4 class="widgettitle">',
        'after_title'   => '</h4>',
        'before_widget' => '<div class="widget-wrap">',
        'after_widget'  => '</div></div>'
    );

    public function widget( $args, $instance ) {

        echo $args['before_widget'];

        if ( ! empty( $instance['title'] ) ) {
            echo $args['before_title'] . apply_filters( 'widget_title', $instance['title'] ) . $args['after_title'];
        }

        echo '<div class="textwidget">';

        echo esc_html__( $instance['text'], 'text_domain' );

        echo '</div>';

        echo $args['after_widget'];

    }

    public function form( $instance ) {

        $title = ! empty( $instance['title'] ) ? $instance['title'] : esc_html__( '', 'text_domain' );
        $text = ! empty( $instance['text'] ) ? $instance['text'] : esc_html__( '', 'text_domain' );
        ?>
        <p>
            <label for="<?php echo esc_attr( $this->get_field_id( 'title' ) ); ?>"><?php esc_attr_e( 'Title:', 'text_domain' ); ?></label>
            <input class="widefat" id="<?php echo esc_attr( $this->get_field_id( 'title' ) ); ?>" name="<?php echo esc_attr( $this->get_field_name( 'title' ) ); ?>" type="text" value="<?php echo esc_attr( $title ); ?>">
        </p>
        <p>
            <textarea class="widefat" id="<?php echo esc_attr( $this->get_field_id( 'text' ) ); ?>" name="<?php echo esc_attr( $this->get_field_name( 'text' ) ); ?>" type="text" cols="30" rows="10"><?php echo esc_attr( $text ); ?></textarea>
        </p>
        <?php

    }

    public function update( $new_instance, $old_instance ) {

        $instance = array();

        $instance['title'] = ( !empty( $new_instance['title'] ) ) ? strip_tags( $new_instance['title'] ) : '';
        $instance['text'] = ( !empty( $new_instance['text'] ) ) ? $new_instance['text'] : '';

        return $instance;
    }

}
$my_widget = new My_Widget();
Text Widget
To build the text widget from the example at the beginning of this article. You will start by setting up a widget class that extends the WP_Widget class.
In the class constructor you will call the parent constructor and pass it your widget’s base ID and name. Also in the class constructor you will hook into the widgets_init action to register your widget.
Next you will declare the arguments you will use when creating your widget. There are four arguments you must define, before_title, after_title, before_widget, and after_widget. These arguments will define the code that wraps your widgets title and the widget itself.
After defining your arguments, you will define the widgets function. This function takes two parameters, the $args array from before, and the $instance of the widget, and is the function that will process options from the form and display the HTML for the widget on the front-end of your site. In the example above the widget function simply outputs the widget title, while passing it through the widget_title filter. It then out puts a simple widget wrapper and the content of the widget’s text field. As outlined in the example, you can access the options from the widget that are stored in the $instance.
Next you will define the form function. This function takes one parameter, $instance, and outputs the form that the user uses to create the widget in the Widgets admin screen. In the example above, the function starts by defining the $title and $textvariables and setting them to the previously entered values, if those values exist. Then it outputs a simple form with a text field for the title and a textarea for the text content.
Lastly you will define the update function. This function takes two parameters, $new_instance and $old_instance, and is responsible for updating your widgets with new options when they are submitted. Here you simply define $instance as an empty array. You then set the title and text keys to the $new_instance values if they exist. You then return $instance.
Finally, when all of the above is defined, you instantiate your new widget class and test your work.
Sample Widget
/**
 * Adds Foo_Widget widget.
 */
class Foo_Widget extends WP_Widget {

    /**
     * Register widget with WordPress.
     */
    public function __construct() {
        parent::__construct(
            'foo_widget', // Base ID
            'Foo_Widget', // Name
            array( 'description' => __( 'A Foo Widget', 'text_domain' ), ) // Args
        );
    }

    /**
     * Front-end display of widget.
     *
     * @see WP_Widget::widget()
     *
     * @param array $args     Widget arguments.
     * @param array $instance Saved values from database.
     */
    public function widget( $args, $instance ) {
        extract( $args );
        $title = apply_filters( 'widget_title', $instance['title'] );

        echo $before_widget;
        if ( ! empty( $title ) ) {
            echo $before_title . $title . $after_title;
        }
        echo __( 'Hello, World!', 'text_domain' );
        echo $after_widget;
    }

    /**
     * Back-end widget form.
     *
     * @see WP_Widget::form()
     *
     * @param array $instance Previously saved values from database.
     */
    public function form( $instance ) {
        if ( isset( $instance[ 'title' ] ) ) {
            $title = $instance[ 'title' ];
        }
        else {
            $title = __( 'New title', 'text_domain' );
        }
        ?>
        <p>
        <label for="<?php echo $this->get_field_name( 'title' ); ?>"><?php _e( 'Title:' ); ?></label>
        <input class="widefat" id="<?php echo $this->get_field_id( 'title' ); ?>" name="<?php echo $this->get_field_name( 'title' ); ?>" type="text" value="<?php echo esc_attr( $title ); ?>" />
        </p>
        <?php
    }

    /**
     * Sanitize widget form values as they are saved.
     *
     * @see WP_Widget::update()
     *
     * @param array $new_instance Values just sent to be saved.
     * @param array $old_instance Previously saved values from database.
     *
     * @return array Updated safe values to be saved.
     */
    public function update( $new_instance, $old_instance ) {
        $instance = array();
        $instance['title'] = ( !empty( $new_instance['title'] ) ) ? strip_tags( $new_instance['title'] ) : '';

        return $instance;
    }

} // class Foo_Widget
This sample widget can then be registered in the widgets_init hook:
// Register Foo_Widget widget
add_action( 'widgets_init', function() { register_widget( 'Foo_Widget' ); } );
Example with a Namespace
If you use PHP 5.3 with namespaces you should call the constructor directly as in the following example:
namespace a\b\c;

class My_Widget_Class extends \WP_Widget {
    function __construct() {
            parent::__construct( 'baseID', 'name' );
        }
        // ... rest of the functions
}
and call the register widget with:
add_action( 'widgets_init', function() { register_widget( 'a\b\c\My_Widget_Class' ); } );
See this answer at stack exchange for more detail.
Special considerations
If you want to use a widget inside another template file, rather than in a sidebar, you can use the_widget() to display it programmatically. The function accepts widget class names. You pass the widget class name to the function like this:
<h1><?php the_title(); ?></h1>

<div class="content">
    <?php the_content(); ?>
</div>

<div class="widget-section">
    <?php the_widget( 'My_Widget_Class' ); ?>
</div>
You may want to use this approach if you need to use a widget in a specific area on a page, such as displaying a list of events next to a form in a section on the front page of your site or displaying an email capture form on a mega-menu alongside your navigation.
< aside id="%1$s" class="widget %2$s"> - Explained+
$num = 5;
$location = 'tree';

$format = 'There are %d monkeys in the %s';
echo sprintf($format, $num, $location);
The above example will output:
There are 5 monkeys in the tree
However imagine we are creating a format string in a separate file, commonly because we would like to internationalize it and we rewrite it as:
$format = 'The %s contains %d monkeys';
echo sprintf($format, $num, $location);
We now have a problem. The order of the placeholders in the format string does not match the order of the arguments in the code. We would like to leave the code as is and simply indicate in the format string which arguments the placeholders refer to. We would write the format string like this instead:
$format = 'The %2$s contains %1$d monkeys';
echo sprintf($format, $num, $location);
An added benefit is that placeholders can be repeated without adding more arguments in the code.
$format = 'The %2$s contains %1$d monkeys.
           That\'s a nice %2$s full of %1$d monkeys.';
echo sprintf($format, $num, $location);
When using argument swapping, the n$ position specifier must come immediately after the percent sign (%), before any other specifiers, as shown below.
Dashboard Widgets API - Codex
The most common use for pagination in WordPress sites is to break up long lists of posts into separate pages. Whether you’re viewing a category, archive, or default index page for a blog or site, WordPress only shows 10 posts per page by default. Users can change the number of posts that appear on each page on the Reading screen: Admin > Settings > Reading.
Loop with Pagination
This simplified example shows where you can add pagination functions for the main loop. Add the functions just before or after the loop.
<?php if ( have_posts() ) : ?>
    <!-- Add the pagination functions here. -->
    <!-- Start of the main loop. -->
    <?php while ( have_posts() ) : the_post(); ?>
    <!-- the rest of your theme's main loop -->
    <?php endwhile; ?>
    <!-- End of the main loop -->
    <!-- Add the pagination functions here. -->
<div class="nav-previous alignleft"><?php next_posts_link( 'Older posts' ); ?></div>
<div class="nav-next alignright"><?php previous_posts_link( 'Newer posts' ); ?></div>
<?php else : ?>
<?php _e('Sorry, no posts matched your criteria.'); ?>
<?php endif; ?>
Note: When using any of these pagination functions outside the template file with the loop that is being paginated, you must call the global variable $wp_query.
function your_themes_pagination(){
    global $wp_query;
    echo paginate_links();
}
WordPress has numerous functions for displaying links to other pages in your loop. Some of these functions are only used in very specific contexts. You would use a different function on a single post page then you would on a archive page. The following section covers archive template pagination functions. The section after that cover single post pagination.
Simple Pagination
posts_nav_link();
One of the simplest methods is posts_nav_link(). Simply place the function in your template after your loop. This generates both links to the next page of posts and previous page of posts where applicable. This function is ideal for themes that have simple pagination requirements.
next_posts_link();
previous_posts_link();
When building a theme, use next_posts_link() and prev_posts_link(). to have control over where the previous and next posts page link appears.
If you need to pass the pagination links to a PHP variable, you can use get_next_posts_link() and get_previous_posts_link().
$next_posts = get_next_posts_link();
$prev_posts = get_previous_posts_link();
Numerical Pagination
When you have many pages of content it is a better experience to display a list of page numbers so the user can click on any one of the page links rather then having to repeatedly click next or previous posts. WordPress provides several functions for automatically displaying a numerical pagination list.
For WordPress 4.1+
If you want more robust pagination options, you can use the_posts_pagination() for WordPress 4.1 and higher. This will output a set of page numbers with links to previous and next pages of posts.
the_posts_pagination();
If you want your pagination to support older versions of WordPress, you must use paginate_links().
Pagination Between Single Posts
All of the previous functions should be used on index and archive pages. When you are viewing a single blog post, you must use prev_post_link and next_post_link. Place the following functions below the loop on your single.php.
previous_post_link();
next_post_link();
Pagination within a post
WordPress gives you a tag that can be placed in post content to enable pagination for that post.
<!--nextpage-->
If you use that tag in the content, you need to ensure that the wp_link_pages function is placed in your single.php template within the loop.
<?php if ( have_posts() ) : ?>

    <!-- Start of the main loop. -->
    <?php while ( have_posts() ) : the_post(); ?>

        <?php the_content(); ?>

        <?php wp_link_pages(); ?>

    <?php endwhile; ?>

<?php endif; ?>
Definitive Guide to WordPress Post/Page Navigation
Posted by Jeff Starr • Updated on February 10th, 2017
In WordPress you can upload, store, and display a variety of media such as image, video and audio files. Media can be uploaded via the Media > Add New in the Administration Screen, or Add Media button on the Post/Page Editor.
If a media file is uploaded within the edit screen, it will be automatically attached to the current post being created or edited. If it is uploaded via the Media’s Add New Screen or the Media Library Screen, it will be unattached, but may become attached to a post when it is inserted into a post later on.
Retrieving attachment ID or image ID
To retrieve the attachment ID, use get_posts() or get_children() function. This example retrieves the all attachments of the current post and getting all metadata of attachment(wp_get_attachment_metadata()) by specifying the ID.
// Insert into the Loop
$args = array(
    'post_parent'    => get_the_ID(),
    'post_type'      => 'attachment',
);
$attachments = get_posts( $args );


if ( $attachments ) {
    foreach ( $attachments as $attachment ) {
        $meta_data = wp_get_attachment_metadata( $attachment->ID, false );
    }
}
If you want to retrieve images from the post ID only, specify post_mime_type as image.
$args = array(
    'post_parent'    => get_the_ID(),
    'post_type'      => 'attachment',
    'post_mime_type' => 'image',
);
When you cannot get your attached media by get_posts() or get_children()function, confirm your media is really attached to the post.
From the Administration Screen, Click Media > Library to open the Media Library and confirm the value in “Uploaded to” column of the media.
Audio
You can directly embed audio files and play them back using a simple shortcode [audio]. Supported file types are mp3, ogg, wma, m4a and wav.
Following shortcode displays audio player that loads music.mp3 file:
[audio src="music.mp3"]
To use the shortcode from template file, use do_shortcode function. When music.mp3 file was stored in (theme_directory)/sounds directory, insert following code into your template file:
$music_file = get_template_directory_uri() . "/sounds/music.mp3";
echo do_shortcode('[audio mp3=' . $music_file . ']');
The shortcode creates the audio player as shown in the screenshot below.

Loop
- “off” – Do not loop the media. Default.
- “on” – Media will loop to beginning when finished and automatically continue playing.
autoplay
- 0 – Do not automatically play the media. Default.
- 1 – Media will play as soon as it is ready.
The following example starts playing music immediately after the page load and loops.
echo do_shortcode('[audio mp3=' . $music_file . ' loop = "on" autoplay = 1]');
Styling
If you want to change the look & feel of audio player, you can do so by targeting the default class name of “wp-audio-shortcode”. If you insert following code into your style.css, half width of audio player will be displayed.
.wp-audio-shortcode {
  width: 50%;
}
Supported Audio Format - mp3, ogg, wma, m4a, wav
For more technical details such as the internal library that enables this function, refer to
- https://make.wordpress.org/core/2013/04/08/audio-video-support-in-core/.
- Audio Shortcode
- Function do_shortcode()
Images
This section describes the handling of images in the Media Library. If you want to display the image file located within your theme directory, just specify the location with the img tag, and style it with CSS.
<img src="<?php echo get_template_directory_uri() . '/images/logo.png'; ?>" />
To display the image in the Media Library, use wp_get_attachment_image() function.
echo wp_get_attachment_image( $attachment->ID, 'thumbnail' );
You will get the following HTML output with the selected thumbnail size
<img width="150" height="150" src="http://example.com/wordpress/wp-content/uploads/2016/11/sample-150x150.jpg" class="attachment-thumbnail size-thumbnail" ... />
You can specify other size such as ‘full’ for original image or ‘medium’ and ‘large’ for the sizes set at Settings > Media in the Administration Screen, or any pair of width and height as array. You’re also free to set custom size strings with add_image_size();
echo wp_get_attachment_image( $attachment->ID, Array(640, 480) );
Getting URL of image
If you want to get the URL of the image, use wp_get_attachment_image_src(). It returns an array (URL, width, height, is_intermediate), or false, if no image is available.
$image_attributes = wp_get_attachment_image_src( $attachment->ID );
if ( $image_attributes ) : ?>
    <img src="<?php echo $image_attributes[0]; ?>" width="<?php echo $image_attributes[1]; ?>" height="<?php echo $image_attributes[2]; ?>" />
<?php endif; ?>
Alignments
When adding the image in your site, you can specify the image alignment as right, left, center or none. WordPress core automatically adds CSS classes to align the image: alignright, alignleft, aligncenter, alignnone
<img class="aligncenter size-full wp-image-131" src= ... />
Caption
If a Caption was specified to image in the Media Library, HTML img element was enclosed by the shortcode [caption] and [/caption].
<div class="mceTemp">
<dl id="attachment_133" class="wp-caption aligncenter" style="width: 1210px">
	<dt class="wp-caption-dt">
		<img class="size-full wp-image-133" src="http://example.com/wordpress/wp-content/uploads/2016/11/sample.jpg" alt="sun set" width="1200" height="400" />
	</dt>
		<dd class="wp-caption-dd">Sun set over the sea</dd>
</dl></div>
And, it will be rendered as in HTML as the figure tag:
<figure id="attachment_133" style="width: 1200px" class="wp-caption aligncenter">
    <img class="size-full wp-image-133" src="http://example.com/wordpress/wp-content/uploads/2016/11/sample.jpg" alt="sun set" width="1200" height="400" srcset= ... />

<figcaption class="wp-caption-text">Sun set over the sea</figcaption>

</figure>
Similar to alignments, your theme must include following styles: wp-caption and wp-caption-text
References
wp_get_attachment_image()wp_get_attachment_image_src()- Styling Images in Posts and Pages
- CSS (Codex)
Galleries
Image galleries are the best way to showcase your pictures on your WordPress sites. WordPress bundles the Create Gallery feature by default in the media uploader which allows you to create a simple gallery.
Before adding a gallery, you must have images in your media library. Otherwise, you need to upload the images into the library and can proceed on gallery creation.
The Gallery feature allows you to add one or more image galleries to your posts and pages using a simple Shortcode.
The basic form of gallery shortcode is:
[gallery]
ids argument in your post or page, only images that are “attached” to that post or page will be displayed.
If you need to add multiple images with ID’s, use the following sample shortcode
[gallery ids="10, 205, 552, 607"]
//Note: 10, 205, 552 and 607 are the IDs of respected image.
NOTE: find the proper IDs of the images for the gallery. Go to Media library and click on the respected image and ID will appear on the URL.
To use the shortcode from the template file, use the do_shortcode() function. Insert the following code into your template file:
echo do_shortcode( [gallery] );
If you need to use the shortcode with IDs, insert the following code in your template file:
echo do_shortcode( [gallery ids="10, 205, 552, 607"] );
Usage
There are may options that may be specified using the below syntax:
[gallery option1="value1" option2="value2"]
If you want to print the gallery directly on the template file, use ` do_shortcode()` function like below:
<?php echo do_shortcode('[gallery option1="value1"]'); ?>
If you need to filter the shortcodes, the following example gives you some tips
// Note: 'the_content' filter is used to filter the content of the post after it is retrieved from the database and before it is printed to the screen
 <?php $gallery_shortcode = '[gallery id="' . intval( $post->post_parent ) . '"]';
    print apply_filters( 'the_content', $gallery_shortcode );
 ?>
Shortcode Options
Gallery Shortcodes supports the basic options which are listed below:
’orderby’ specifies the order the thumbnails show up. The default order is ‘menu_order’.
- menu_order: You can reorder the images in the Gallery tab of the Add Media popup
- title: Order by the title of the image in the Media Library
- post_date: Sort by date/time
- rand: Order randomly
- ID: Specify the post ID
order specify the sort order used to display thumbnail; ASC or DESC. For Example, to sort by ID and DESC:
[gallery order="DESC" orderby="ID"]
If you need to print it on template file, use the do_shortcode() function;
<?php echo do_shortcode(' [gallery order="DESC" orderby="ID"]'); ?>
The Columns options specify the number of columns in the gallery. The default value is 3.
[gallery columns="4"]
If you need to print it on your template file, use the do_shortcode() function;
<?php echo do_shortcode(' [gallery columns="4"] '); ?>
The IDs option on the gallery shortcode loads images with specific post IDs.
If you want to display the attached image with the specific post ID, follow the following code example.
// Note: remove each space between brackets and 'gallery' and brackets and `123"`.
//Here "123" stands for the post IDs. If you want to display more than one IDs, separate the IDs by `comma(,)`.
[ gallery id="123" ]
Use ‘do_shortcode’ function to print the gallery with IDs on template files like below:
// Note: remove each space between brackets and 'gallery' and brackets and `123"`.
<?php echo do_shortcode(' [ gallery id="123" ] '); ?>
Size determines the image size to use for the thumbnail display. Valid values include “thumbnail”, “medium”, “large”, “full” and any other additional image size that was registered with add_image_size(). The default value is “thumbnail”. The size of the images for “thumbnail”, “medium” and “large” can be configured in WordPress admin panel under Settings > Media.
[gallery size="medium"]
Some advanced options are also available on Gallery shortcodes.
- itemtag - The name of the HTML tag used to enclose each item in the gallery. The default is “dl” .
- icontag - The name of the HTMLtag used to enclose each thumbnail icon in the gallery. The default is “dt” .
- captiontag - The name of the HTML tag used to enclose each caption. The default is “dd” .
You are allowed to change the defaults.
[gallery itemtag="div" icontag="span" captiontag="p"]
Link: Specify where you want the image to link. The default value links to the attachment’s permalink. Options:
- file – Link directly to image file
- none – No link
[gallery link="file"]
Include: Include allows you to insert an “array” of comma separated attachment IDs to show only the images from these attachments.
[gallery include="23,39,45"]
Exclude: Exclude callows you to insert an “array” of comma separated attachment IDs to not show the images from these attachments.
[gallery exclude="21,32,43"]
Please note that include and exclude cannot be used together.
References
Video
The WordPress video feature allows you to embed video files and play them back using a simple shortcode [video]. Supported file types are mp4, m4v, webm, ogv, wmv and flv.
[video src="pepper.mp4"]
To use the shortcode in the template file, use the do_shortcode() function. If the video file is stored in in your theme directory, get the file url directly using get_template_directory_uri() or get_stylesheet_uri()
$video_file = get_template_directory_uri() . "/videos/pepper.mp4";
echo do_shortcode('[video mp4=' . $video_file . ']');
The following video player will be loaded.

Loop and Autoplay
The following example starts playing the video immediately after the page load and loops.
echo do_shortcode('[video mp4=' . $video_file . ' loop = "on" autoplay = 1]');
Poster: Defines image to show as placeholder before the media plays. The following same code takes album_cover.jpg stored in (theme directory)/images folder as the initial image:
echo do_shortcode('[video mp4=' . $video_file . ' poster = ' . get_template_directory_uri() . '/images/album_cover.jpg]');
Height and Width:
The following example will load the audio player with 320 pixels width and 240 pixels height:
echo do_shortcode('[video mp4=' . $video_file . ' width = 320 height = 240]');
Value is automatically detected on file upload. When you omit this option, the media file width/height is used. The theme’s content_width sets the maximum width.
Styling: If you want to change look & feel of video player from stylesheet, you can target the class name of “wp-video-shortcode”. If you want to show the audio player like above in 320 x 240 size, insert following code into your stylesheet.
.wp-video-shortcode {
  width: 320px;
  height: 240px;
}
References
Featured images (also sometimes called Post Thumbnails) are images that represent an individual Post, Page, or Custom Post Type. When you create your Theme, you can output the featured image in a number of different ways, on your archive page, in your header, or above a post, for example.
Enabling Support for Featured Image
Themes must declare support for the Featured Image function before the Featured Image interface will appear on the Edit screen. Support is declared by putting the following in your theme’s functions.php file:
add_theme_support( 'post-thumbnails' );
Setting a Featured Image
Once you add support for Featured Images, the Featured Image meta box will be visible on the appropriate content item’s Edit screens. If a user is unable to see it, they can enable it in their screen options.
By default, the Featured Image meta box is displayed in the sidebar of the Edit Post and Edit Page screens.
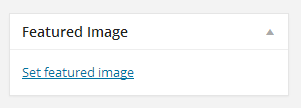
Function Reference
add_image_size()– Register a new image size…
set_post_thumbnail_size() – Registers an image size for the post thumbnail…
has_post_thumbnail() – Check if post has an image attached…
the_post_thumbnail() – Display Post Thumbnail…
get_the_post_thumbnail() – Retrieve Post Thumbnail…
get_post_thumbnail_id() – Retrieve Post Thumbnail ID…
Image Sizes
The default image sizes of WordPress are “Thumbnail”, “Medium”, “Large” and “Full Size” (the original size of the image you uploaded). These image sizes can be configured in the WordPress Administration Media panel under >Settings > Media. You can also define your own image size by passing an array with your image dimensions:
the_post_thumbnail(); // Without parameter ->; Thumbnail
the_post_thumbnail( 'thumbnail' ); // Thumbnail (default 150px x 150px max)
the_post_thumbnail( 'medium' ); // Medium resolution (default 300px x 300px max)
the_post_thumbnail( 'medium_large' ); // Medium-large resolution (default 768px x no height limit max)
the_post_thumbnail( 'large' ); // Large resolution (default 1024px x 1024px max)
the_post_thumbnail( 'full' ); // Original image resolution (unmodified)
the_post_thumbnail( array( 100, 100 ) ); // Other resolutions (height, width)
Add Custom Featured Image Sizes
Here is an example of how to create custom Featured Image sizes in your theme’s functions.php file.
if ( function_exists( 'add_theme_support' ) ) {
    add_theme_support( 'post-thumbnails' );
    set_post_thumbnail_size( 150, 150, true ); // default Featured Image dimensions (cropped)

    // additional image sizes
    // delete the next line if you do not need additional image sizes
    add_image_size( 'category-thumb', 300, 9999 ); // 300 pixels wide (and unlimited height)
 }
Set the Featured Image Output Size
To be used in the current Theme’s functions.php file. You can use set_post_thumbnail_size() to set the default Featured Image size by resizing the image proportionally (that is, without distorting it):
set_post_thumbnail_size( 50, 50 ); // 50 pixels wide by 50 pixels tall, resize mode
Set the default Featured Image size by cropping the image (either from the sides, or from the top and bottom):
set_post_thumbnail_size( 50, 50, true ); // 50 pixels wide by 50 pixels tall, crop mode
Styling Featured Images
Featured Images are given a class “wp-post-image”. They also get a class depending on the size of the thumbnail being displayed. You can style the output with these CSS selectors:
img.wp-post-image
img.attachment-thumbnail
img.attachment-medium
img.attachment-large
img.attachment-full
You can also give Featured Images their own classes by using the attribute parameter in the_post_thumbnail().
Display the Featured Image with a class “alignleft”:
the_post_thumbnail( 'thumbnail', array( 'class' => 'alignleft' ) );
Default Usages
// check if the post or page has a Featured Image assigned to it.
if ( has_post_thumbnail() ) {
    the_post_thumbnail();
}
Note: To return the Featured Image for use in your PHP code instead of displaying it, use: get_the_post_thumbnail()
// check for a Featured Image and then assign it to a PHP variable for later use
if ( has_post_thumbnail() ) {
    $featured_image = get_the_post_thumbnail();
}
Linking to Post Permalink or Larger Image
Alert: Don’t use these two examples together in the same Theme.
Example 1. To link Post Thumbnails to the Post Permalink in a specific loop, use the following within your Theme’s template files:
<?php if ( has_post_thumbnail()) : ?>
   <a href="<?php the_permalink(); ?>" title="<?php the_title_attribute(); ?>" >
   <?php the_post_thumbnail(); ?>
   </a>
 <?php endif; ?>
Example 2. To link all Post Thumbnails on your website to the Post Permalink, put this in the current Theme’s functions.php file:
add_filter( 'post_thumbnail_html', 'my_post_image_html', 10, 3 );

function my_post_image_html( $html, $post_id, $post_image_id ) {

  $html = '<a href="' . get_permalink( $post_id ) . '" title="' . esc_attr( get_the_title( $post_id ) ) . '">' . $html . '</a>';
  return $html;

}
This example links to the “large” Post Thumbnail image size and must be used within The Loop.
<?php
 if ( has_post_thumbnail()) {
    $large_image_url = wp_get_attachment_image_src( get_post_thumbnail_id(), 'large');
    echo '<a href="' . $large_image_url[0] . '" title="' . the_title_attribute('echo=0') . '" >';
    the_post_thumbnail('thumbnail');
    echo '</a>';
 }
 ?>
References
Internationalization
Internationalization is the process of developing your theme, so it can easily be translated into other languages. Internationalization is often abbreviated as i18n (because there are 18 letters between the letters i and n).
How to internationalize your theme?
For the text in the theme to be able to be translated easily the text should not be hardcoded in the theme but be passed as an argument through one of the localization functions in WordPress.
The following example could not be translated unless the translator modified the source code which is not very efficient.
<h1>Settings Page</h1>
By passing the string through a localization function it can be easily parsed to be translated.
<h1><?php __( 'Settings Page' ); ?></h1>
WordPress uses gettext libraries to be able to add the translations in PHP. In WordPress you should use the WordPress localization functions instead of the native PHP gettext-compliant translation functions.
Text Domain
The text domain is the second argument that is used in the internationalization functions. The text domain is a unique identifier, allowing WordPress to distinguish between all of the loaded translations. The text domain is only needed to be defined for themes and plugins.
Themes that are hosted on WordPress.org the text domain must match the slug of your theme URL (wordpress.org/themes/<slug>). This is needed so that the translations from translate.wordpress.org work correctly.
The text domain name must use dashes and not underscores and be lowercase. For example, if the theme’s name My Theme is defined in the style.css or it is contained in a folder called my-theme the text domain should be my-theme .
The text domain is used in three different places:
- In the style.css theme header
- As an argument in the localization functions
- As an argument when loading the translations using
load_theme_textdomain() or load_child_theme_textdomain()
style.css theme header
The text domain is added to the style.css header so that the theme meta-data like the description can be translated even when the theme is not enabled. The text domain should be same as the one used when loading the text domain.
Example:
/*
* Theme Name: My Theme
* Author: Theme Author
* Text Domain: my-theme
*/
Domain Path
The domain path is needed when the translations are saved in a directory other than languages . This is so that WordPress knows where to find the translation when the theme is not activated. For example, if .mo files are located in the languages folder then Domain Path will be /languages and must be written with the first slash. Defaults to the languages folder in the theme.
Example:
/*
* Theme Name: My Theme
* Author: Theme Author
* Text Domain: my-theme
* Domain Path: /languages
*/
Add text domain to strings
The text domain should be added as an argument to all of the localization functions for the translations to work correctly.
Examples:
__( 'Post' )
should become
__( 'Post', 'my-theme' )

__( 'Post', 'my-theme' )
should become
_e( 'Post', 'my-theme' )

_n( 'One post', '%s posts', $count )
should become
_n( 'One post', '%s posts', $count, 'my-theme' )
__( 'Translate me.' , $text_domain );
Loading Translations
The translations in WordPress are saved in .po and .mo files which need to be loaded. They can be loaded by using the functionsload_theme_textdomain() or load_child_theme_textdomain(). This loads {locale}.mo from your theme’s base directory or {text-domain}-{locale}.mo from the WordPress theme language folder in /wp-content/languages/themes/.
wp-content for translations from translate.wordpress.org. This means that plugins that are translated via translate.wordpress.org do not require load_plugin_textdomain() anymore.If you don’t want to add a
load_plugin_textdomain() call to your plugin you should set the Requires at least: field in your readme.txt to 4.6.
To find out more about the different language and country codes, see the list of languages.
Basic Functions - follow handbook from here
Localization
Data Sanitization/Escaping
Sanitization: Securing Input
Sanitization is the process of cleaning or filtering your input data. Whether the data is from a user or an API or web service, you use sanitizing when you don’t know what to expect or you don’t want to be strict with data validation.
The easiest way to sanitize data is with built-in WordPress functions.
The sanitize_*() series of helper functions provide an effective way to ensure you’re ending up with safe data, and they require minimal effort on your part:
- sanitize_email()
- sanitize_file_name()
- sanitize_html_class()
- sanitize_key()
- sanitize_meta()
- sanitize_mime_type()
- sanitize_option()
- sanitize_sql_orderby()
- sanitize_text_field()
- sanitize_title()
- sanitize_title_for_query()
- sanitize_title_with_dashes()
- sanitize_user()
- esc_url_raw()
- wp_filter_post_kses()
- wp_filter_nohtml_kses()
Let’s say we have an input field named title.
<input id="title" type="text" name="title">
You can sanitize the input data with the sanitize_text_field() function:
$title = sanitize_text_field( $_POST['title'] );
update_post_meta( $post->ID, 'title', $title );
Behind the scenes, sanitize_text_field() does the following:
- Checks for invalid UTF-8
- Converts single less-than characters (<) to entity
- Strips all tags
- Removes line breaks, tabs and extra white space
- Strips octets
Tip: Remember, rely on the WordPress API and its help functions to assist with securing your themes.
Escaping: Securing Output
Whenever you’re outputting data make sure to properly escape it.
Escaping is the process of securing output by stripping out unwanted data, like malformed HTML or script tags, preventing this data from being seen as code.
Escaping helps secure your data prior to rendering it for the end user and prevents XSS (Cross-site scripting) attacks.
WordPress has a few helper functions you can use for most common scenarios.
- esc_html() – Use this function anytime an HTML element encloses a section of data being displayed.
<?php echo esc_html( $title ); ?>src and href attributes of an HTML element.<img src="<?php echo esc_url( $great_user_picture_url ); ?>" /><a href="#" onclick="<?php echo esc_js( $custom_js ); ?>">Click me</a><ul class="<?php echo esc_attr( $stored_class ); ?>"> </ul><textarea><?php echo esc_textarea( $text ); ?></textarea>Escaping with Localization
Rather than using echo to output data, it’s common to use the WordPress localization functions, such as _e() or __().
These functions simply wrap a localization function inside an escaping function:
esc_html_e( 'Hello World', 'text_domain' );
// same as
echo esc_html( __( 'Hello World', 'text_domain' ) );
These helper functions combine localization and escaping:
Custom Escaping
In the case that you need to escape your output in a specific way, the function wp_kses() (pronounced “kisses”) will come in handy. For example, there are instances when your want HTML elements or attributes to display in your output.
This function makes sure that only the specified HTML elements, attributes, and attribute values will occur in your output, and normalizes HTML entities.
$allowed_html = [
    'a'      => [
        'href'  => [],
        'title' => [],
    ],
    'br'     => [],
    'em'     => [],
    'strong' => [],
];
echo wp_kses( $custom_content, $allowed_html );
wp_kses_post() is a wrapper function for wp_kses where $allowed_html is a set of rules used by post content.
echo wp_kses_post( $post_content );
Database Escaping
All data in SQL queries must be SQL-escaped before the SQL query is executed to prevent against SQL injection attacks. WordPress provides helper classes to assist with escaping SQL queries $wpdb.
Selecting Data
The escaped SQL query ($sql in this example) can then be used with one of the methods:
- $wpdb->get_row($sql)
- $wpdb->get_var($sql)
- $wpdb->get_results($sql)
- $wpdb->get_col($sql)
- $wpdb->query($sql)
Inserting and Updating Data
Like Statements
Data Validation
Data validation is the process of analyzing the data against a predefined pattern (or patterns) with a definitive result: valid or invalid.
Usually this applies to data coming from external sources such as user input and calls to web services via API.
Simple examples of data validation:
- Check that required fields have not been left blank
- Check that an entered phone number only contains numbers and punctuation
- Check that an entered postal code is a valid postal code
- Check that a quantity field is greater than 0
Data validation should be performed as early as possible. That means validating the data before performing any actions.
Note:
Validation can be performed by using JavaScript on the front end and by using PHP on the back end.
Built-in PHP functions
Basic validation is doable using many built-in PHP functions, including these:
isset()andempty()for checking whether a variable exists and isn’t blankmb_strlen()orstrlen()for checking that a string has the expected number of characterspreg_match(),strpos()for checking for occurrences of certain strings in other stringscount()for checking how many items are in an arrayin_array()for checking whether something exists in an array
Core WordPress functions
WordPress provides many useful functions that help validate different kinds of data. Here are several examples:
- is_email() will validate whether an email address is valid.
- term_exists() checks whether a tag, category, or other taxonomy term exists.
- username_exists() checks if username exists.
- validate_file() will validate that an entered file path is a real path (but not whether the file exists).
Check the the list of conditional tags for more functions like these.
Search for functions with names like these: *_exists(), *_validate(), and is_*(). Not all of these are validation functions, but many are helpful.
Custom PHP and JavaScript functions
You can write your own PHP and JavaScript functions and include them in your plugin. When writing a validation function, you’ll want to name it like a question (examples: is_phone, is_available, is_us_zipcode).
The function should return a boolean, either true or false, depending on whether the data is valid or not. This will allow using the function as a condition.
Example 1
Let’s say you have an U.S. zip code input field that a user submits.
<input id="wporg_zip_code" type="text" maxlength="10" name="wporg_zip_code">
The text field allows up to 10 characters of input with no limitations on the types of characters that can be used. Users could enter something valid like 1234567890 or something invalid (and evil) like eval().
The maxlength attribute on our input field is only enforced by the browser, so you still need to validate the length of the input on the server. If you don’t, an attacker could alter the maxlength value.
By using validation we can ensure we’re accepting only valid zip codes.
First you need to write a function to validate a U.S. zip codes:
<?php function is_us_zip_code($zip_code) { // scenario 1: empty if (empty($zip_code)) { return false; } // scenario 2: more than 10 characters if (strlen(trim($zip_code)) > 10) {
        return false;
    }

    // scenario 3: incorrect format
    if (!preg_match('/^\d{5}(\-?\d{4})?$/', $zip_code)) {
        return false;
    }

    // passed successfully
    return true;
}
When processing the form, your code should check the wporg_zip_code field and perform the action based on the result:
if ( isset( $_POST['wporg_zip_code'] ) && is_us_zip_code( $_POST['wporg_zip_code'] ) ) {
    // your action
}
Example 2
Say you’re going to query the database for some posts, and you want to give the user the ability to sort the query results.
This example code checks an incoming sort key (stored in the “orderby” input parameter) for validity by comparing it against an array of allowed sort keys using the built-in PHP function in_array. This prevents the user from passing in malicious data and potentially compromising the website.
Before checking the incoming sort key against the array, the key is passed into the built-in WordPress function sanitize_key. This function ensures, among other things, that the key is in lowercase (in_array performs a case-sensitive search).
Passing “true” into the third parameter of in_array enables strict type checking, which tells the function to not only compare values but value types as well. This allows the code to be certain that the incoming sort key is a string and not some other data type.
<?php
$allowed_keys = ['author', 'post_author', 'date', 'post_date'];

$orderby = sanitize_key( $_POST['orderby'] );

if ( in_array( $orderby, $allowed_keys, true ) ) {
    // modify the query to sort by the orderby key
}
Using Nonces
WordPress nonces are one-time use security tokens generated by WordPress to help protect URLs and forms from misuse.
If your theme allows users to submit data; be it in the Admin or the front-end; nonces can be used to verify a user intends to perform an action, and is instrumental in protecting against Cross-Site Request Forgery(CSRF).
An example is a WordPress site in which authorized users are allowed to upload videos. As an authorized user uploading videos is an intentional action and permitted. However, in a CSRF, a hacker can hijack (forge) the use of an authorized user and perform a fraudulent submission.
The one-time use hash generated by a nonce, prevents this type of forged attacks from being successful by validating the upload request is done by the current logged in user. Nonces are unique only to the current user’s session, so if an attempt is made to log in or out any nonces on the page become invalid.
Creating a Nonce
- wp_nonce_url() – Adding a nonce to an URL.
- wp_nonce_field() – Adding a nonce to a form.
- wp_create_nonce() – Using a nonce in a custom way; useful for processing AJAX requests.
Verifying a Nonce
- check_admin_referer() – To verify a nonce that was passed in a URL or a form in an admin screen.
- check_ajax_referer() – Checks the nonce (but not the referrer), and if the check fails then by default it terminates script execution.
- wp_verify_nonce() – To verify a nonce passed in some other context.
Example
In this example, we have a basic submission form.
Create the Nonce
To secure your form with a nonce, create a hidden nonce field using wp_nonce_field()function:
<form method="post">
   <!-- some inputs here ... -->
   <?php wp_nonce_field( 'name_of_my_action', 'name_of_nonce_field' ); ?>
</form>
Verify the Nonce
In our example we first check if the nonce field is set since we do not want to run anything if the form has not been submitted. If the form has been submitted we use the nonce field value function. If nonce verification is successful the form will process.
if (
    ! isset( $_POST['name_of_nonce_field'] )
    || ! wp_verify_nonce( $_POST['name_of_nonce_field'], 'name_of_my_action' )
) {

   print 'Sorry, your nonce did not verify.';
   exit;

} else {

   // process form data
}
In this example the basic nonce process:
- Generates a nonce with the wp_nonce_field() function.
- The nonce is submitted with the form submission.
- The nonce is verified for validity using the wp_verify_nonce() function. If not verified the request exits with an error message.
Common Vulnerabilities
Security is an ever-changing landscape, and vulnerabilities evolve over time. The following is a discussion of common vulnerabilities you should protect against, and the techniques for protecting your theme from exploitation.
Types of Vulnerabilities:
SQL Injection
SQL injection happens when values being inputted are not properly sanitized allowing for any SQL commands in the inputted data to potentially be executed. To prevent this, the WordPress API is extensive, offering functions like add_post_meta(); instead of you needing to adding the post meta manually via SQL (INSERT INTO wp_postmeta…).
But sometimes you need to do complex queries, that have not been accounted for in the API. If this is the case, always use the $wpdb functions. These were built specifically to protect your database.
All data in SQL queries must be SQL-escaped before the SQL query is executed to prevent against SQL injection attacks. The best function to use for SQL-escaping is $wpdb->prepare() which supports both a sprintf()-like and vsprintf()-like syntax.
$wpdb->get_var( $wpdb->prepare(
  "SELECT something FROM table WHERE foo = %s and status = %d",
  $name, // an unescaped string (function will do the sanitization for you)
  $status // an untrusted integer (function will do the sanitization for you)
) );
Cross Site Scripting (XSS)
Cross Site Scripting (XSS) happens when a nefarious party injects JavaScript into a web page.
Avoid XSS vulnerabilities by escaping output, stripping out unwanted data. As a theme’s primary responsibility is outputting content, a theme should escape dynamic content with the proper function depending on the type of the content.
An example of one of the escaping functions is escaping URL from a user profile.
<img src="<?php echo esc_url( $great_user_picture_url ); ?>" />
Content that has HTML entities within can be sanitized to allow only specified HTML elements.
$allowed_html = array(
    'a' => array(
        'href' => array(),
        'title' => array()
    ),
    'br' => array(),
    'em' => array(),
    'strong' => array(),
);

echo wp_kses( $custom_content, $allowed_html );
Cross-site Request Forgery (CSRF)
Cross-site request forgery or CSRF (pronounced sea-surf) is when a nefarious party tricks a user into performing an unwanted action within a web application they are authenticated in. For example, a phishing email might contain a link to a page that would delete a user’s account in the WordPress admin.
If your theme includes any HTML or HTTP-based form submissions, use a nonce to guarantee a user intends to perform an action.
<form method="post">
   <-- some inputs here ... -->
   <?php wp_nonce_field( 'name_of_my_action', 'name_of_nonce_field' ); ?>
</form>
Staying Current
It is important to stay current on potential security holes. The following resources provide a good starting point:
Child Theme
A child theme allows you to change small aspects of your site’s appearance yet still preserve your theme’s look and functionality. To understand how child themes work it is first important to understand the relationship between parent and child themes.
What is a Parent Theme?
A parent theme is a complete theme which includes all of the required WordPress template files and assets for the theme to work. All themes – excluding child themes – are considered parent themes.
How to Create a Child Theme
1. Create a child theme folder
First, create a new folder in your themes directory, located at wp-content/themes.
The directory needs a name. It’s best practice to give a child theme the same name as the parent, but with -child appended to the end. For example, if you were making a child theme of twentyfifteen, then the directory would be named twentyfifteen-child.
2. Create a stylesheet: style.css
Next, you’ll need to create a stylesheet file named style.css, which will contain all of the CSS rules and declarations that control the look of your theme. Your stylesheet must contain the below required header comment at the very top of the file. This tells WordPress basic info about the theme, including the fact that it is a child theme with a particular parent.
/*
 Theme Name:   Twenty Fifteen Child
 Theme URI:    http://example.com/twenty-fifteen-child/
 Description:  Twenty Fifteen Child Theme
 Author:       John Doe
 Author URI:   http://example.com
 Template:     twentyfifteen
 Version:      1.0.0
 License:      GNU General Public License v2 or later
 License URI:  http://www.gnu.org/licenses/gpl-2.0.html
 Tags:         light, dark, two-columns, right-sidebar, responsive-layout, accessibility-ready
 Text Domain:  twenty-fifteen-child
*/
The following information is required:
- Theme Name – needs to be unique to your theme
- Template – the name of the parent theme directory. The parent theme in our example is the Twenty Fifteen theme, so the Template will be twentyfifteen. You may be working with a different theme, so adjust accordingly.
Add remaining information as applicable. The only required child theme file is style.css, but functions.php is necessary to enqueue styles correctly (below).
3. Enqueue stylesheet
The final step is to enqueue the parent and child theme stylesheets.
Note: In the past, the common method was to import the parent theme stylesheet using @import; this is no longer the recommended practice, as it increases the amount of time it takes style sheets to load. Plus it is possible for the parent stylesheet to get included twice.
The recommended way of enqueuing the parent theme stylesheet currently is to add a wp_enqueue_scripts action and use wp_enqueue_style() in your child theme’s functions.php.
You will therefore need to create a functions.php in your child theme directory. The first line of your child theme’s functions.php will be an opening PHP tag (<?php), after which you can enqueue your parent and child theme stylesheets. The following example function will only work if your Parent Theme uses only one main style.cssto hold all of the css. If your child theme has more than one .css file (eg. ie.css, style.css, main.css) then you will have to make sure to maintain all of the Parent Theme dependencies.
<?php
add_action( 'wp_enqueue_scripts', 'my_theme_enqueue_styles' );
function my_theme_enqueue_styles() {
    wp_enqueue_style( 'parent-style', get_template_directory_uri() . '/style.css' );

}
?>
If your child theme style.css contains actual CSS code (as it normally does), you will need to enqueue it as well. Setting ‘parent-style’ as a dependency will ensure that the child theme stylesheet loads after it. Including the child theme version number ensures that you can bust cache also for the child theme. The complete (recommended) example becomes:
<?php
add_action( 'wp_enqueue_scripts', 'my_theme_enqueue_styles' );
function my_theme_enqueue_styles() {

    $parent_style = 'parent-style'; // This is 'twentyfifteen-style' for the Twenty Fifteen theme.

    wp_enqueue_style( $parent_style, get_template_directory_uri() . '/style.css' );
    wp_enqueue_style( 'child-style',
        get_stylesheet_directory_uri() . '/style.css',
        array( $parent_style ),
        wp_get_theme()->get('Version')
    );
}
?>
Activate child theme - wp handbook
JavaScript Best Practices
get_template_directory vs get_template_directory_uri – Explained
get_template_directory():
get_template_directory() is a function which returns the absolute template path directory of the theme. It generates the hosting directory of the template. Please check the example below.
/Applications/XAMPP/xamppfiles/htdocs/wp/wp-content/themes/test
get_template_directory_uri():
It is almost the same, but it retrieves the full URI of the template directory. You can use it to print the URL of the template directory. It retrieves the full URI including the http://. You can use it outside of the Include function. Generally, we use get_template_directory_uri() function to print the style.css or javascript source. You can also use it to print for any other reasons. Get_template_directory_uri() prints like that.
http://localhost/wp/wp-content/themes/test
Usage
<link rel="stylesheet" type="text/css" href="<?php echo esc_url(get_template_directory_uri()); ?>/style.css"/>
<img src="<?php echo get_template_directory_uri(); ?>/assets/img/flexslider/flex-1.jpg" />
get_theme_file_uri( string $file = '' )
Retrieves the URL of a file in the theme.
Searches in the stylesheet directory before the template directory so themes which inherit from a parent theme can just override one file.
<img src="<?php echo get_theme_file_uri( 'images/photo.jpg' ); ?>">
bloginfo()
bloginfo( string $show = '' )
Displays information about the current site.
- ‘name’ – Site title (set in Settings > General)
- ‘description’ – Site tagline (set in Settings > General)
- ‘wpurl’ – The WordPress address (URL) (set in Settings > General)
- ‘url’ – The Site address (URL) (set in Settings > General)
- ‘admin_email’ – Admin email (set in Settings > General)
- ‘charset’ – The "Encoding for pages and feeds" (set in Settings > Reading)
- ‘version’ – The current WordPress version
- ‘html_type’ – The content-type (default: "text/html"). Themes and plugins can override the default value using the ‘pre_option_html_type’ filter
- ‘text_direction’ – The text direction determined by the site’s language. is_rtl() should be used instead
- ‘language’ – Language code for the current site
- ‘stylesheet_url’ – URL to the stylesheet for the active theme. An active child theme will take precedence over this value
- ‘stylesheet_directory’ – Directory path for the active theme. An active child theme will take precedence over this value
- ‘template_url’ / ‘template_directory’ – URL of the active theme’s directory. An active child theme will NOT take precedence over this value
- ‘pingback_url’ – The pingback XML-RPC file URL (xmlrpc.php)
- ‘atom_url’ – The Atom feed URL (/feed/atom)
- ‘rdf_url’ – The RDF/RSS 1.0 feed URL (/feed/rdf)
- ‘rss_url’ – The RSS 0.92 feed URL (/feed/rss)
- ‘rss2_url’ – The RSS 2.0 feed URL (/feed)
- ‘comments_atom_url’ – The comments Atom feed URL (/comments/feed)
- ‘comments_rss2_url’ – The comments RSS 2.0 feed URL (/comments/feed)
wp_title()
wp_title( string $sep = '»', bool $display = true, string $seplocation = '' )
Display or retrieve page title for all areas of blog.
<title><?php wp_title(''); echo ' | '; bloginfo( 'name' ); ?></title>
<?php wp_title('|',true,'right'); ?> <?php bloginfo('name'); ?>
To solve the Homepage empty title tag - this code below, on header.php template:
<title>
    <?php if(is_front_page() || is_home()){
        echo get_bloginfo('name');
    } else{
        echo wp_title('');
    }?>
</title>
Starting with 4.1 and Twenty Fifteen, the recommended way for themes to display titles is by adding theme support like this:
function theme_slug_setup() {
   add_theme_support( 'title-tag' );
}
add_action( 'after_setup_theme', 'theme_slug_setup' );
Support should be added on the after_setup_theme or init action, but no later than that. It does not accept any further arguments.
get_the_category()
post_class()
the_ID()
get_the_id()
wp_kses_post()
get_permalink()
wp_link_pages()
if you want to enable revisions in WordPress, you can do so manually by editing the wp-config.php file in your site’s root directory.
define('WP_POST_REVISIONS', false);
Change the false value to true.
If there is no line like this, add the following above where it says “ABSPATH” and “/* That's all, stop editing! Happy publishing. */”:
define('WP_POST_REVISIONS', true);
You can then enter a command to run on your WordPress database. In the command box, enter the following:
DELETE FROM wp_posts WHERE post_type=”revision”;
To manually set a limit on the revisions you allow in WordPress, you can edit the code in your wp-config.php file.
define('WP_POST_REVISIONS', 3);
We’ve used 3 as an example value above, but you can change this number to reflect however many revisions you want your database to store per page or post.
developer.wordpress.org/plugins/post-types/registering-custom-post-types/
developer.wordpress.org/reference/functions/get_post_type_labels/
developer.wordpress.org/reference/functions/add_meta_box/
How To Create A WordPress Custom Post Type Without A Plugin
Video Tuts by WPLearningLab - Feb 12, 2018
wpbeginner.com/wp-tutorials/how-to-create-custom-post-types-in-wordpress/
kinsta.com/blog/wordpress-custom-post-types
cloudways.com/blog/how-to-create-custom-post-types-in-wordpress/
wordpress.stackexchange.com/questions/364645/singular-name-label-in-custom-post-type
mugo.ca/Blog/Adding-complex-fields-to-WordPress-custom-post-types
WordPress Custom Fields for Custom Post Type
Video Tuts by RALEIGH -
github.com/ruvictor/wp-events-post-type
Add the following code to the function.php file
/* Custom Post Type Start */

function create_posttype() {
register_post_type( 'news',
// CPT Options

array(
  'labels' => array(
   'name' => __( 'news' ),
   'singular_name' => __( 'News' )
  ),
  'public' => true,
  'has_archive' => false,
  'rewrite' => array('slug' => 'news'),
 )
);
}
// Hooking up our function to theme setup
add_action( 'init', 'create_posttype' );

/* Custom Post Type End */
/*Custom Post type start*/
function cw_post_type_news() {
    $supports = array(
    'title', // post title
    'editor', // post content
    'author', // post author
    'thumbnail', // featured images
    'excerpt', // post excerpt
    'custom-fields', // custom fields
    'comments', // post comments
    'revisions', // post revisions
    'post-formats', // post formats
    );
    $labels = array(
    'name' => _x('news', 'plural'),
    'singular_name' => _x('news', 'singular'),
    'menu_name' => _x('news', 'admin menu'),
    'name_admin_bar' => _x('news', 'admin bar'),
    'add_new' => _x('Add New', 'add new'),
    'add_new_item' => __('Add New news'),
    'new_item' => __('New news'),
    'edit_item' => __('Edit news'),
    'view_item' => __('View news'),
    'all_items' => __('All news'),
    'search_items' => __('Search news'),
    'not_found' => __('No news found.'),
    );
    $args = array(
    'supports' => $supports,
    'labels' => $labels,
    'public' => true,
    'query_var' => true,
    'rewrite' => array('slug' => 'news'),
    'has_archive' => true,
    'hierarchical' => false,
    );
    register_post_type('news', $args);
}

add_action('init', 'cw_post_type_news');
/*Custom Post type end*/
Creating a template and fetching a list requires creating a new file named template-news.php
<?php
/*Template Name: News*/
get_header();
query_posts(array(
   'post_type' => 'news'
)); ?>
<?php
while (have_posts()) : the_post(); ?>
<h2><a href="<?php the_permalink() ?>"><?php the_title(); ?></a></h2>
<p><?php the_excerpt(); ?></p>
<?php endwhile;
get_footer();
?>
/**
 * Setup query to show the ‘services’ post type with ‘8’ posts.
 * Output the title with an excerpt.
 */
    $args = array(
        'post_type' => 'services',
        'post_status' => 'publish',
        'posts_per_page' => 8,
        'orderby’ => 'title',
        'order’ => 'ASC',
    );

    $loop = new WP_Query( $args );

    while ( $loop->have_posts() ) : $loop->the_post();
        the_title();
        the_excerpt();
    endwhile;

    wp_reset_postdata();
/**
 * Setup query to show the ‘services’ post type with ‘8’ posts.
 * Output the title with an excerpt.
 */
    $args = array(
        'post_type' => 'services',
        'post_status' => 'publish',
        'posts_per_page' => 8,
        'orderby’ => 'title',
        'order’ => 'ASC',
    );

    $loop = new WP_Query( $args );

    while ( $loop->have_posts() ) : $loop->the_post();
        print the_title();
        the_excerpt();
    endwhile;

    wp_reset_postdata();
/**
 * Setup query to show the ‘services’ post type with all posts filtered by 'home' category.
 * Output is linked title with featured image and excerpt.
 */

    $args = array(
        'post_type' => 'services',
        'post_status' => 'publish',
        'posts_per_page' => -1,
        'orderby' => 'title',
        'order' => 'ASC',
        'cat' => 'home',
    );

    $loop = new WP_Query( $args );

    while ( $loop->have_posts() ) : $loop->the_post();
        $featured_img = wp_get_attachment_image_src( $post->ID );
        print the_title();
        if ( $feature_img ) {
           < img src="print $featured_img['url']" width=”print $featured_img['width']" height="print $featured_img['height']" />
        }
        the_excerpt();
    endwhile;

    wp_reset_postdata();
Labels
The labels parameter lets you customize all the labels used throughout the WordPress backend. It’s usually as simple as find/replacing the plural and singular forms of the post type, but you may want to tweak some of the other labels more extensively.
Supports
The supports parameter lets you specify which WordPress features should be enabled for this post type. Options:
- ‘title’
- ‘editor’ (content)
- ‘author’
- ‘thumbnail’ (featured image, current theme must also support post-thumbnails)
- ‘excerpt’
- ‘trackbacks’
- ‘custom-fields’
- ‘comments’ (also will see comment count balloon on edit screen)
- ‘revisions’ (will store revisions)
- ‘page-attributes’ (menu order, hierarchical must be true to show Parent option)
- ‘post-formats’ add post formats, see Post Formats
Show in REST
WP Query - WP codex
 <?php
// the query
$the_query = new WP_Query( $args ); ?>

<?php if ( $the_query->have_posts() ) : ?>

	<!-- pagination here -->

	<!-- the loop -->
	<?php while ( $the_query->have_posts() ) : $the_query->the_post(); ?>
		<h2><?php the_title(); ?></h2>
	<?php endwhile; ?>
	<!-- end of the loop -->

	<!-- pagination here -->

	<?php wp_reset_postdata(); ?>

<?php else : ?>
	<p><?php _e( 'Sorry, no posts matched your criteria.' ); ?></p>
<?php endif; ?>
developer.wordpress.org/reference/functions/get_search_form/
codex.wordpress.org/Creating_a_Search_Page
WordPress provides a method get_search_form() to display search form on the website. This method looks for searchform.php file in your active theme’s directory for displaying search form. If this file does not exist then WordPress displays default search form which is included in its core.
Create searchform.php file in your active theme’s directory. In this file add your markup of search form. For instance, in our case search form HTML is as follows.
<form id="searchform" method="get" action="<?php echo home_url('/'); ?>">
    <input type="text" class="search-field" name="s" placeholder="Search" value="<?php the_search_query(); ?>">
    <input type="submit" value="Search">
</form>
Customize Search Result
Sometimes your website has more resources like books, magazines, ebooks, PDFs, etc. And You need to cover content from all these resources in the search result.
Assuming you have custom post types for all these resources, you need to add a hidden field for each post type in the search form.
Let’s say you have created custom post types for above resources like book, magazine, ebook, pdf. Then, your hidden fields will be as follows.
<form id="searchform" method="get" action="<?php echo home_url('/'); ?>">
    <input type="text" class="search-field" name="s" placeholder="Search" value="<?php the_search_query(); ?>">
    <input type="hidden" name="post_type[]" value="book" />
    <input type="hidden" name="post_type[]" value="magazine" />
    <input type="hidden" name="post_type[]" value="ebook" />
    <input type="hidden" name="post_type[]" value="pdf" />
    <input type="submit" value="Search">
</form>
Now when someone enters a keyword in the search field, WordPress searches in all above post types for matching the result.
developer.wordpress.org/reference/functions/the_search_query/
developer.wordpress.org/reference/functions/get_template_part/
WordPress get_template_part Tutorial
Video Tuts by LearnWebCode - June 9, 2014
get_template_part( 'nav' );           // Navigation bar (nav.php)
get_template_part( 'nav', '2' );      // Navigation bar #2 (nav-2.php)
get_template_part( 'nav', 'single' ); // Navigation bar to use in single pages (nav-single.php)

 // if you have a folder called “partials” in your theme directory and a
 // template part called “content-page.php” in that sub-folder.
 // get_template_part() has the ability to search one directory deep.
get_template_part( 'partials/content', 'page' );

// will include layout.php from template-parts subdirectory placed in the root of your theme folder.
get_template_part('template-parts/layout');
wordpress.org/reference/functions/wp_link_pages/
WordPress Functions wp_link_pages function Part-5
Video Tuts by Imran Sayed - Nov 19, 2017
WordPress Theme Development Tutorial - Underscores Starter Theme
How to Display Blog Post Meta Data in Your WordPress Themes
Tips, Tricks and Best Plugins for Customizing WordPress Menus
How to Prevent WordPress from Generating Image Sizes
Hide Header & Footer on Certain Page(s) +
.page-id-XX .site-header, .page-id-XX .site-footer { display: none; }
.post-id-XX .site-header, .page-id-XX .site-footer { display: none; }
Common WordPress template files
Below is a list of some basic theme templates and files recognized by WordPress.
- index.php
- The main template file. It is required in all themes.
- style.css
- The main stylesheet. It is required in all themes and contains the information header for your theme.
- rtl.css
- The right-to-left stylesheet is included automatically if the website language’s text direction is right-to-left.
- comments.php
- The comments template.
- front-page.php
- The front page template is always used as the site front page if it exists, regardless of what settings on Admin > Settings > Reading.
- home.php
- The home page template is the front page by default. If you do not set WordPress to use a static front page, this template is used to show latest posts.
- header.php
- The header template file usually contains your site’s document type, meta information, links to stylesheets and scripts, and other data.
- singular.php
- The singular template is used for posts when
single.phpis not found, or for pages whenpage.phpare not found. Ifsingular.phpis not found,index.phpis used.- single.php
- The single post template is used when a visitor requests a single post.
- single-{post-type}.php
- The single post template used when a visitor requests a single post from a custom post type. For example,
single-book.phpwould be used for displaying single posts from a custom post type named book. Theindex.phpis used if a specific query template for the custom post type is not present.- archive-{post-type}.php
- The archive post type template is used when visitors request a custom post type archive. For example,
archive-books.phpwould be used for displaying an archive of posts from the custom post type named books. Thearchive.phptemplate file is used if thearchive-{post-type}.phpis not present.- page.php
- The page template is used when visitors request individual pages, which are a built-in template.
- page-{slug}.php
- The page slug template is used when visitors request a specific page, for example one with the “about” slug (page-about.php).
- category.php
- The category template is used when visitors request posts by category.
- tag.php
- The tag template is used when visitors request posts by tag.
- taxonomy.php
- The taxonomy term template is used when a visitor requests a term in a custom taxonomy.
- author.php
- The author page template is used whenever a visitor loads an author page.
- date.php
- The date/time template is used when posts are requested by date or time. For example, the pages generated with these slugs:
http://example.com/blog/2014/
http://example.com/blog/2014/05/
http://example.com/blog/2014/05/26/- archive.php
- The archive template is used when visitors request posts by category, author, or date. Note: this template will be overridden if more specific templates are present like
category.php,author.php, anddate.php.- search.php
- The search results template is used to display a visitor’s search results.
- attachment.php
- The attachment template is used when viewing a single attachment like an image, pdf, or other media file.
- image.php
- The image attachment template is a more specific version of
attachment.phpand is used when viewing a single image attachment. If not present, WordPress will useattachment.phpinstead.- 404.php
- The 404 template is used when WordPress cannot find a post, page, or other content that matches the visitor’s request.
- Excerpts vs. Full Posts #
You can choose whether to display full posts or just excerpts. By displaying excerpts, you shorten the length of your archive page.
Open your file and find the loop. Look for:
the_content()And replace it with:
the_excerpt()And if your theme is displaying excerpts but you want to display the full content, replace the_excerpt with the_content.
Note: Themes without header.php and footer.php, with no alternative available, have been deprecated since WordPress 3.0. Your theme may need to include these files as well.
Note: style.css should reside in the root directory of your theme not within the CSS directory.
Tip: You can also use Conditional Tags to control which templates are loaded on a specific page.
Home Page display
By default, WordPress sets your site’s home page to display your latest blog posts. This page is called the blog posts index. You can also set your blog posts to display on a separate static page. The template file home.php is used to render the blog posts index, whether it is being used as the front page or on separate static page. If home.php does not exist, WordPress will use index.php.
- home.php
- index.php
Note: If front-page.php exists, it will override the home.php template.
The front-page.php template file is used to render your site’s front page, whether the front page displays the blog posts index (mentioned above) or a static page. The front page template takes precedence over the blog posts index (home.php) template. If the front-page.php file does not exist, WordPress will either use the home.php or page.php files depending on the setup in Settings → Reading. If neither of those files exist, it will use the index.php file.
front-page.php– Used for both “your latest posts” or “a static page” as set in the front page displays section of Settings → Reading.home.php– If WordPress cannot findfront-page.phpand “your latest posts” is set in the front page displays section, it will look forhome.php. Additionally, WordPress will look for this file when the posts page is set in the front page displays section.page.php– When “front page” is set in the front page displays section.index.php– When “your latest posts” is set in the front page displays section buthome.phpdoes not exist or when front page is set butpage.phpdoes not exist.
What is a Template Tag?
A template tag is simply a piece of code that tells WordPress to get something from the database. It is broken up into three components:
- A PHP code tag
- A WordPress function
- Optional parameters
- the_title() – tells WordPress to get the title of the page or post from the database and include it.
- bloginfo( 'name' ) – tells WordPress to get the blog title out of the database and include it in the template file.
- get_header() tells WordPress to get the header.php file and include it in the current theme file.
- get_footer() tells WordPress to get the footer.php file.
WordPress Child Theme Template
An article by phppot.com - February 1st, 2017 by Vincy.